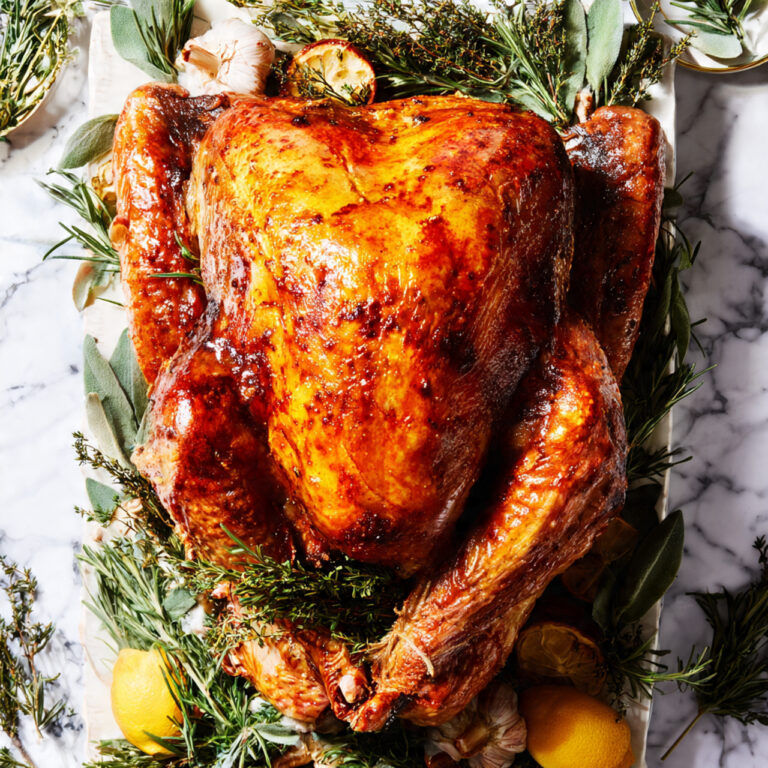
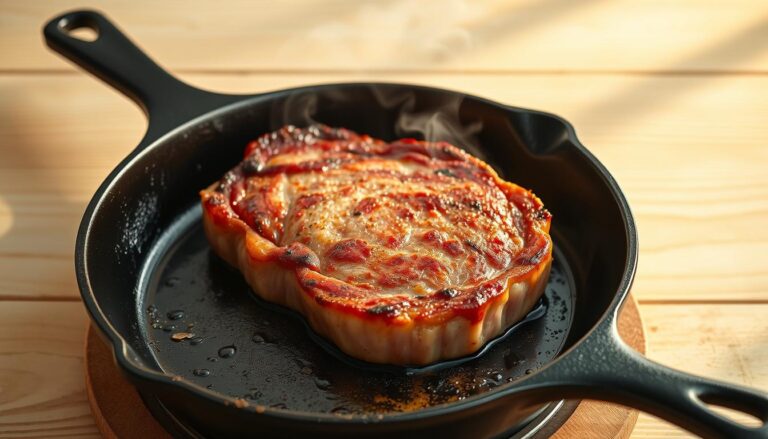
How to Cook a Perfectly Delicious Cooked Turkey
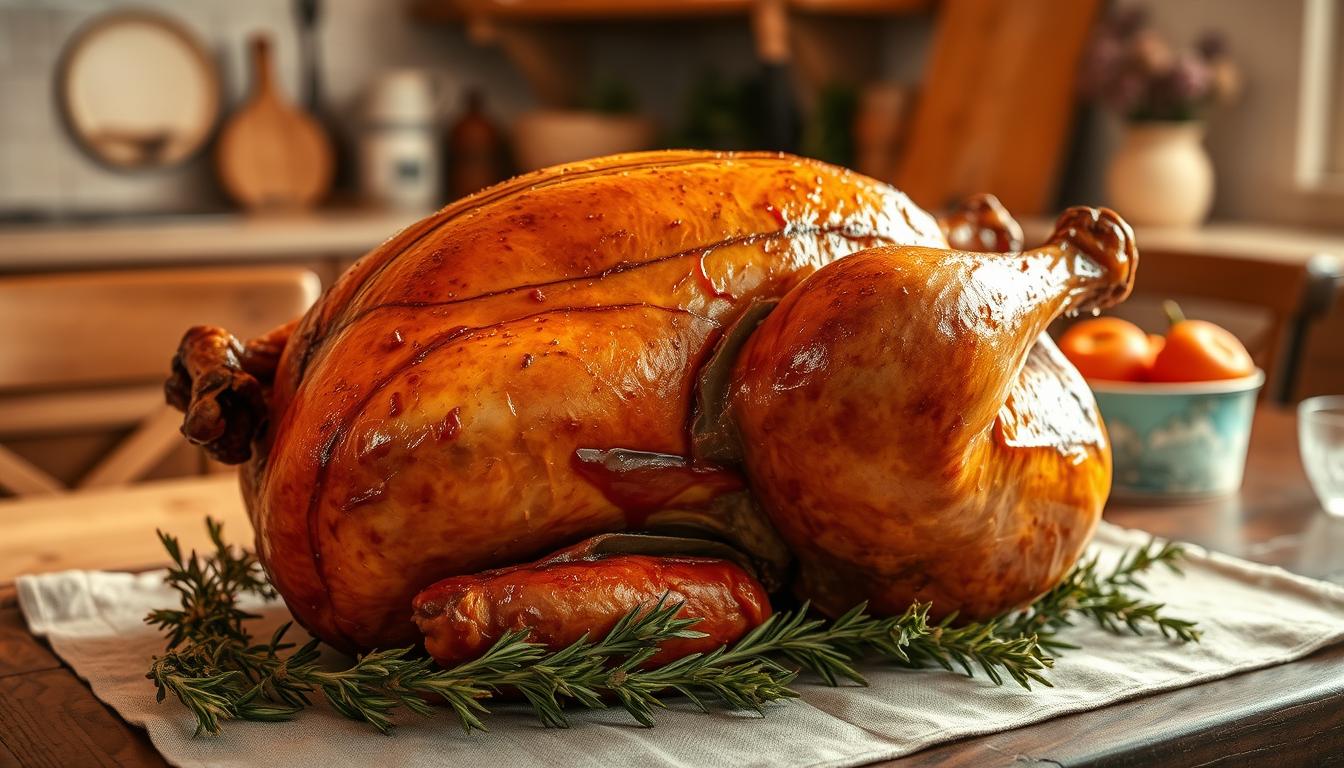
Every family gathering is filled with excitement. The moment the golden-brown turkey comes out of the kitchen is unforgettable. It promises a feast of memories.
Cooking the perfect turkey is more than just following a recipe. It’s about creating a centerpiece that turns a simple meal into a special celebration.
Preparing a delicious turkey dinner needs skill, patience, and insider techniques. These can take your cooking from good to exceptional. Whether you’re hosting your first holiday meal or you’re an experienced chef, mastering the art of a perfectly cooked turkey is key.
This guide will take you through every step of making a mouthwatering turkey. Your guests will be asking for seconds. We’ll show you professional techniques for selecting the right bird and achieving that crispy, golden skin.
Table of Contents
Essential Preparation Steps Before Cooking
Preparing a holiday turkey needs careful planning and detail. Your success in the kitchen begins long before the turkey goes in the oven. Taking the right steps ensures a delicious and memorable meal for your family and friends.
Selecting the Perfect Turkey Size
Choosing the right size holiday turkey is key for a successful feast. Follow these guidelines to find the perfect turkey weight:
- Small gatherings (4-6 people): 8-12 pound turkey breast
- Medium gatherings (8-10 people): 12-16 pound turkey
- Large gatherings (12-16 people): 16-20 pound turkey
Thawing Your Turkey Safely
Proper thawing is crucial for food safety and even cooking. The refrigerator method is the most recommended for your holiday turkey.
| Turkey Weight | Refrigerator Thawing Time |
|---|---|
| 4-5 pounds | 1 day |
| 8-10 pounds | 2-3 days |
| 12-16 pounds | 3-4 days |
Essential Cooking Equipment
Before you start cooking, gather these key tools for smooth turkey preparation:
- Large roasting pan with rack
- Digital meat thermometer
- Kitchen twine for trussing
- Sharp carving knife
- Aluminum foil
Pro tip: Always check your equipment before the big day to avoid last-minute surprises!
Understanding the Perfect Cooked Turkey Temperature
Getting the right temperature is key when cooking your turkey. It’s about food safety and flavor. Your turkey needs to hit a certain internal temperature to be safe and tasty.
The USDA has clear guidelines for cooking turkey safely. Following these temperature tips can make your turkey safe and delicious.
- Recommended internal temperature: 165°F (74°C)
- Check temperature in thickest part of thigh
- Avoid touching bone when measuring
Professional chefs have a smart way to check turkey temperature. They say to take the turkey out of the oven a bit before it reaches 165°F. This way, the meat keeps cooking while it rests.
| Turkey Part | Safe Temperature | Cooking Tip |
|---|---|---|
| Thigh | 165°F | Check deepest section |
| Breast | 165°F | Measure center area |
| Stuffing | 165°F | Check center of cavity |
Get a good meat thermometer for accurate readings. Digital thermometers are fast and precise, helping you cook a perfect turkey every time.
“Temperature is the key to a safe and delicious turkey dinner” – USDA Food Safety Experts
Remember, different turkey parts cook at different speeds. Always check several areas to make sure the whole bird is cooked safely.
Creating the Ultimate Herb Butter Mixture
Start making your holiday turkey special with a tasty herb butter mixture. This secret ingredient will make your turkey dinner unforgettable. It will be full of flavor and stay moist.
Making great herb butter needs careful attention and fresh ingredients. Your turkey will get a special touch. This will make your guests talk about the meal for years.
Selecting the Freshest Herbs
Great herb butter starts with top-notch herbs. Pick herbs that go well together and bring out the turkey’s taste:
- Fresh rosemary – adds a pine-like, woody aroma
- Thyme – brings a subtle, earthy undertone
- Sage – provides a classic poultry seasoning
- Fresh parsley – adds brightness and color
Butter Preparation Techniques
To make a smooth herb butter, follow these steps:
- Use high-quality unsalted butter at room temperature
- Finely chop herbs to release maximum flavor
- Mix herbs thoroughly into softened butter
- Add minced garlic and citrus zest for depth
Application Methods
How you apply herb butter matters a lot. Gently separate the turkey’s skin from the meat. Then, massage the herb butter under the skin. This way, the turkey absorbs the flavor well, staying moist and tasty.
Pro tip: Let the herb butter sit under the skin for at least an hour before roasting. This helps the flavors mix in better.
Turkey Seasoning and Cavity Stuffing

Getting your holiday turkey ready needs careful seasoning and cavity care. Chefs suggest new ways to add flavor and keep food safe. Old turkey stuffing methods are now safer and tastier.
Seasoning your turkey is key. Instead of old cavity stuffing, try these new methods:
- Use aromatics like quartered onions and lemon halves
- Incorporate fresh herb sprigs inside the cavity
- Create a dry seasoning blend for external and internal turkey treatment
Your turkey seasoning plan should aim for great flavor without safety risks. Experts say to skip traditional cavity stuffing because of bacterial dangers.
| Seasoning Method | Flavor Impact | Safety Rating |
|---|---|---|
| Internal Aromatics | High | Excellent |
| Dry Spice Rub | Medium-High | Very Good |
| Traditional Stuffing | Medium | Low |
Choosing the best turkey stuffing method means knowing about food science and safety. By trying new seasoning ways, you can make a tasty holiday turkey. It will wow your guests and keep everyone safe.
Preparing Your Turkey for the Oven
Getting your roasted turkey ready for cooking is a big deal. The right steps can turn a simple turkey dinner into a feast. Making sure your turkey is both tasty and looks great is key.
Cleaning and Patting Dry
First, clean your turkey well. Take out the giblets and rinse the bird inside and out. Then, dry it with paper towels. This step is vital for crispy, golden skin.
- Remove internal packaging
- Rinse turkey thoroughly
- Pat dry with clean paper towels
- Inspect for any remaining feathers
Trussing Techniques
Trussing makes your turkey cook evenly and look nice. Use twine to tie the legs together and tuck the wing tips under. This keeps the turkey from burning and cooks it evenly.
| Trussing Step | Purpose |
|---|---|
| Tie legs together | Promotes even cooking |
| Tuck wing tips | Prevents burning |
| Secure with kitchen twine | Maintains turkey shape |
Pan Placement
Choose a strong roasting pan with a rack. This lets air circulate for even browning. Put the turkey breast-side up and add veggies or herbs for extra flavor.
- Use a heavy-duty roasting pan
- Place turkey on a rack
- Position breast-side up
- Add aromatic vegetables if desired
The Complete Roasting Process
Mastering the roasting process is key to a delicious roasted turkey. It’s all about temperature control and timing.
Begin by heating your oven to 425°F (218°C). This high heat makes the turkey’s skin crispy and golden. Put the turkey in a roasting pan for even heat.
- First 20 minutes: Roast at high temperature (425°F/218°C)
- Remaining cooking time: Reduce to 350°F (175°C)
- Cooking duration: Approximately 13 minutes per pound
Your goal is to keep the turkey moist while getting it perfectly browned. Here are some tips for a great roasted turkey:
- Use a meat thermometer for precise doneness
- Baste every 30 minutes with pan juices or melted butter
- Cover the breast with foil if it browns too quickly
Pro tip: The turkey should reach 165°F (74°C) at its thickest part. This ensures it’s fully cooked and safe.
Basting and Monitoring Techniques
Learning to baste is key to a delicious turkey dinner. The right basting can make your turkey juicy and full of flavor.
Timing Your Basting Perfectly
Basting isn’t just about pouring juices over your turkey. It needs precision. Here’s how to do it right:
- Baste every 30 minutes during cooking
- Use pan drippings or melted butter
- Work quickly to minimize heat loss
Temperature Checking Points
Keeping an eye on your turkey’s temperature is important. Here are the key points to check:
| Location | Target Temperature | Importance |
|---|---|---|
| Thigh | 165°F | Most Critical Area |
| Breast | 160°F | Prevents Dryness |
| Stuffing | 165°F | Food Safety |
“The secret to a perfect turkey dinner is patience and precision in basting and temperature monitoring.” – Professional Chef
Always put your meat thermometer in the thickest part of the thigh, away from the bone. Pro tip: The temperature will continue rising slightly after removing the turkey from the oven, so plan accordingly.
Common Turkey Cooking Mistakes to Avoid

Getting the perfect turkey dinner can be tough, even for seasoned cooks. Knowing the common mistakes helps avoid cooking disasters during the holidays.
Several key errors can ruin your holiday turkey. Here are the top mistakes that can make your festive dinner a letdown:
- Incomplete Turkey Thawing: Rushing thawing can cause uneven cooking and safety risks
- Neglecting to Use a Meat Thermometer: Guessing doneness can lead to undercooked or dry meat
- Frequent Oven Door Opening: This messes with the turkey’s internal temperature and adds to cooking time
- Skipping the Resting Period: Not resting the turkey prevents juices from spreading evenly
To ensure a great turkey dinner, focus on these key steps. Proper preparation and careful monitoring can turn a dry, tough bird into a juicy, flavorful centerpiece.
| Mistake | Consequences | Solution |
|---|---|---|
| Improper Thawing | Uneven cooking, potential bacteria growth | Thaw in refrigerator, allow 24 hours per 4-5 pounds |
| Overcooking | Dry, tough meat | Use meat thermometer, aim for 165°F internal temperature |
| No Resting Time | Loss of juices, less flavorful meat | Let turkey rest 20-30 minutes before carving |
Avoiding these common mistakes will help you make a memorable and tasty holiday turkey. It will impress your guests and please your family’s taste buds.
Resting and Carving Your Turkey
After your turkey comes out of the oven, patience is key. The resting time is vital for a delicious turkey dinner that will wow your guests.
Let your turkey rest for 15-20 minutes before carving. This step is crucial. It makes sure each slice is juicy and full of flavor.
- Cover the turkey loosely with aluminum foil
- Keep the turkey in a warm spot
- Avoid cutting immediately after cooking
When it’s time to carve, follow these expert tips:
- Start by removing the legs and thighs
- Slice breast meat against the grain
- Use a sharp carving knife for clean cuts
- Arrange slices on a beautiful serving platter
Pro tip: For the most tender results, slice your turkey meat thinly and at a slight angle.
The key to a perfect turkey dinner is not just in the cooking, but in the careful resting and precise carving.
Making the Most of Turkey Drippings
After roasting your turkey, the golden-brown drippings are a treasure. Don’t let them go to waste! These drippings are full of rich, intense flavors. They can make your post-holiday cooking even better.
Turning Drippings into Delicious Turkey Gravy
Creating the perfect turkey gravy starts with carefully collected drippings. Here’s a simple method to maximize flavor:
- Strain drippings through a fine-mesh sieve to remove solids
- Separate fat from the liquid using a fat separator
- Create a smooth roux with equal parts butter and flour
- Slowly whisk in strained drippings and additional broth
- Simmer until the turkey gravy reaches desired consistency
Smart Storage for Leftover Turkey Drippings
Your leftover turkey drippings are a culinary secret weapon. Store them properly to extend their usefulness:
- Refrigerate in an airtight container for up to 3 days
- Freeze drippings in portioned containers for up to 3 months
- Use frozen drippings in soups, stews, and sauce bases
“Waste not, want not” takes on a delicious meaning when you transform turkey drippings into multiple meals!
Pro tip: Label your stored drippings with the date to keep track of freshness. These concentrated flavor boosters can elevate everything from rice dishes to vegetable roasts. They make your leftover turkey experience even more enjoyable.
Conclusion
Preparing a perfect turkey dinner takes practice and patience. Each time you cook a holiday turkey, you’ll get better and more confident in the kitchen. Your first try might not be perfect, but with these tips, you’re on the right path to making unforgettable meals.
Leftover turkey can be a real treat. You can make your turkey sandwiches into something special or try new recipes. Remember, turkey stays fresh in the fridge for up to 4 days, giving you time to get creative.
Cooking a delicious turkey is more than just a meal. It’s about making memories with your loved ones. By learning about temperature, seasoning, and preparation, you’re ready for future holiday cooking.
With these tips, you’re set to wow your family and friends with a fantastic turkey dinner. Enjoy the journey, relish the outcome, and keep discovering new recipes.
FAQ
How long does it take to thaw a frozen turkey?
The thawing time varies based on the turkey’s weight. For every 4-5 pounds, allow 24 hours in the fridge. A 15-pound turkey will thaw in 3-4 days. Always thaw it on a tray and keep it wrapped.
What internal temperature ensures a safely cooked turkey?
The USDA says the turkey must reach 165°F (74°C) in the thickest parts. Use a meat thermometer to check. Some chefs suggest removing it at 160°F (71°C), as it will rise more during rest.
How much turkey should I prepare per person?
Plan for 1 pound of turkey per person. This gives big servings and leftovers. For extra meat, plan for 1.5 pounds per person.
How long should I let my turkey rest before carving?
Let the turkey rest for 20-30 minutes after cooking. This makes the meat tender and flavorful. Tent it with foil to keep warm.
Can I stuff the turkey before cooking?
It’s safer to cook stuffing outside the turkey. If stuffing the turkey, make sure it reaches 165°F (74°C). Cooking stuffing separately is best for safety and flavor.
How do I prevent my turkey from drying out?
Use several methods to keep the turkey moist. Make a herb butter and rub it under the skin. Baste every 30 minutes and use a meat thermometer. Let it rest after cooking. Covering the breast with foil helps too.
How long should I cook my turkey?
Cook at 350°F (175°C) for about 13 minutes per pound. But, always check with a meat thermometer. Start at 425°F (218°C) for 20 minutes to crisp the skin, then reduce to 350°F.
What’s the best way to store leftover turkey?
Store leftover turkey in airtight containers in the fridge within two hours. It lasts 3-4 days. Freeze for up to 4 months. Reheat to 165°F (74°C) for safety.