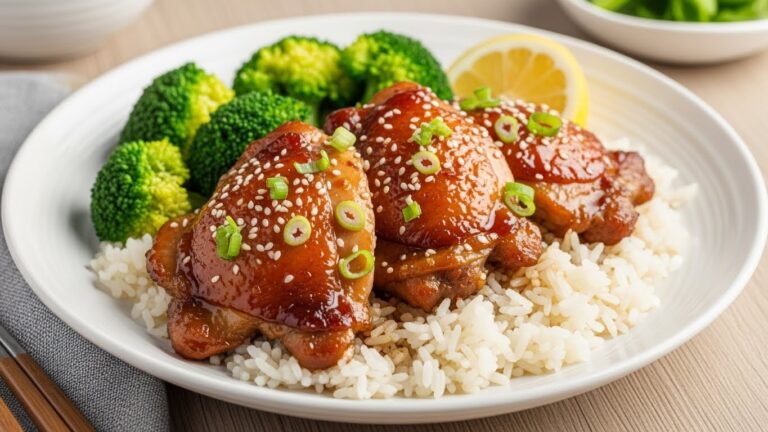
Crispy Sweet Chilli Chicken Recipe: Best Takeout Fakeout

What If You Could Skip the Delivery App and Save 65% While Eating Better?
Let’s face it: we’ve all succumbed to the siren call of sticky, sweet, and spicy takeout chicken on a busy night. But have you ever stopped to calculate the real cost? Beyond the delivery fee and tip, a recent food industry analysis revealed that homemade versions of popular takeout dishes cost, on average, 65% less than their delivered counterparts. The real kicker? Most of us believe replicating that perfect Crispy Sweet Chilli Chicken Recipe at home requires a professional wok, mysterious ingredients, and culinary skills we simply don’t have. This belief keeps us stuck in a cycle of expensive, often greasy, orders.
What if the secret wasn’t complex equipment, but a simple, foolproof technique? This guide is your blueprint to breaking free. We’re diving into a Crispy Sweet Chilli Chicken Recipe that delivers that iconic crackle of perfectly fried chicken coated in a glossy, addictive sauce—all from your own kitchen. Forget soggy disappointments; this is about achieving that restaurant-style crunch and balanced sweet-heat that will make you the star of your own dinner table. Let’s get cooking and reclaim your takeout night.
The Takeout-Tricking Ingredient Lineup

This Crispy Sweet Chilli Chicken Recipe is a masterclass in texture and flavor layering. Each component plays a specific role in mimicking—and honestly, improving upon—your favorite delivery dish.
For the Ultra-Crispy Chicken:
- 1.5 lbs Boneless, Skinless Chicken Thighs (or Breasts), cut into 1-inch pieces: Thighs are more forgiving and stay juicier, but breasts work. The key is uniform size for even cooking.
- ⅓ cup Cornstarch: The magic dust for that shatteringly crisp, light coating. Far superior to flour for this application.
- ¼ cup All-Purpose Flour: Combined with cornstarch, it creates the perfect structure.
- 1 tsp Baking Powder: Your scientific secret! It creates tiny air bubbles for an extra-lift, extra-crispy crust.
- 1 tsp Garlic Powder, 1 tsp Onion Powder: Savory depth in every bite.
- 1 large Egg, beaten: The glue that holds the crisp to the chicken.
- ½ tsp Salt, ¼ tsp Black Pepper
- Neutral Oil for Frying: Vegetable, canola, or peanut oil. You’ll need enough for 1-2 inches of depth in your pot or skillet.
For the Glossy, Addictive Sweet Chilli Glaze:
- ½ cup Sweet Chilli Sauce: The star. Choose a good-quality brand for the best flavor base.
- 3 tbsp Honey: For sticky-sweet gloss and depth. Swap: Maple syrup or agave.
- 2 tbsp Soy Sauce: The salty, umami backbone. Use tamari for gluten-free.
- 1 tbsp Rice Vinegar: The essential bright, tangy note that cuts through the richness.
- 2 cloves Garlic, minced: Fresh is non-negotiable for aromatic punch.
- 1 tbsp Fresh Ginger, grated: Adds a warm, zesty kick.
- 1-2 tsp Sriracha or Chili Garlic Sauce: Adjust to your heat preference.
- 1 tsp Sesame Oil: For that authentic, nutty finish.
- 1 tbsp Water: To help the sauce coat evenly.
For Garnish:
- Sesame Seeds & Sliced Green Onions: The classic, vibrant finish.
Your Strategic Fakeout Timeline
One of the biggest perceived barriers to homemade takeout is time. Let’s dismantle that myth with a strategic plan.
- Active Prep Time: 15 minutes
- Cooking Time: 15 minutes
- Total Time: 30 minutes
Here’s the efficiency breakdown: While your oil heats, you can mix the coating and sauce. The chicken fries in quick, 4-minute batches. This Crispy Sweet Chilli Chicken Recipe is not only 65% cheaper than delivery, but it’s also ready in about the same time it takes for a driver to reach your door—often 20-30 minutes faster when you account for ordering, cooking, and delivery lag at the restaurant. You gain control, quality, and time.
Crafting Your Takeout Masterpiece: A Step-by-Step Guide
Follow these stages to build the perfect textural contrast: crunch, then glaze.
Step 1: The Double-Dredge for Maximum Crisp
In a medium bowl, whisk together the cornstarch, flour, baking powder, garlic powder, onion powder, salt, and pepper. This is your dry mix. In another bowl, beat the egg. Pat your chicken pieces completely dry—this is critical. Toss the dry chicken in the beaten egg, letting excess drip off. Then, dredge each piece thoroughly in the dry mix, pressing to adhere. Place on a plate. Pro Tip: Let the coated chicken sit for 5-10 minutes. This allows the coating to hydrate and set, preventing it from sloughing off in the oil.
Step 2: Fry to Golden-Brown Perfection
In a large, heavy-bottomed pot, Dutch oven, or wok, heat 1.5-2 inches of oil to 350°F (175°C). Use a thermometer for accuracy; temperature is key. Working in small batches to avoid crowding and temperature drop, carefully add the chicken. Fry for 3-4 minutes, turning once, until deeply golden brown, crispy, and cooked through. Transfer to a wire rack set over a baking sheet—not paper towels. The rack keeps the bottom crisp while excess oil drips away.
Step 3: Whip Up the Signature Glaze
While the chicken fries, make the sauce. In a small saucepan, combine the sweet chilli sauce, honey, soy sauce, rice vinegar, minced garlic, grated ginger, and sriracha. Whisk over medium heat until it just begins to simmer and thicken slightly, about 3-4 minutes. Remove from heat and stir in the sesame oil and water. The sauce should be glossy and coat the back of a spoon.
Step 4: The Grand Toss & Glaze
Once all chicken is fried, ensure it’s still hot and crisp. Place it in a large mixing bowl. Pour about two-thirds of the warm sweet chilli glaze over the chicken. Using tongs or a spatula, toss gently but thoroughly until every piece is gleaming and coated. Add more sauce if desired, but avoid drowning it—you want a glossy veneer, not a pool.
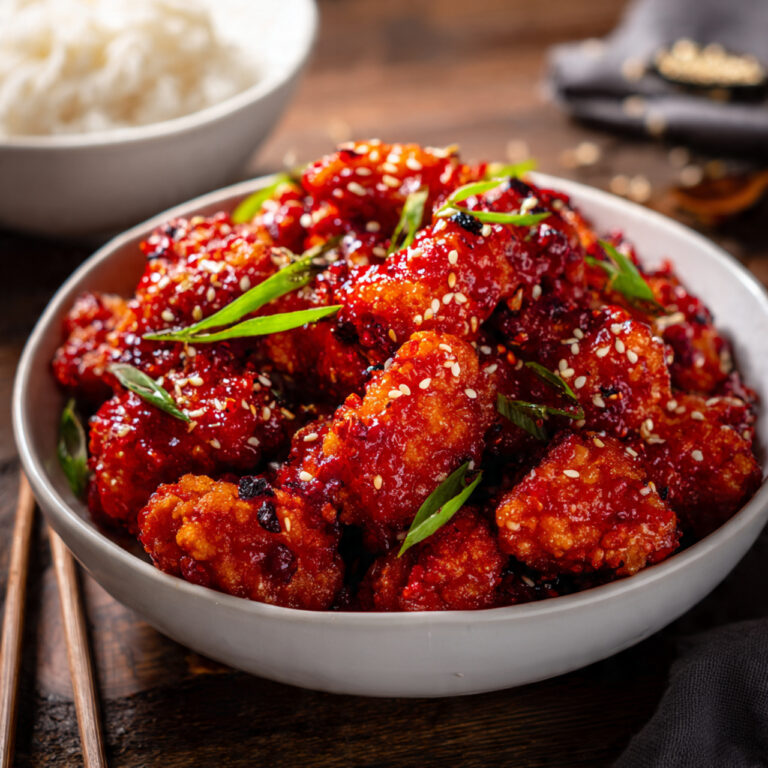
Step 5: Garnish & Serve Immediately
Transfer your glazed Crispy Sweet Chilli Chicken to a serving platter. Sprinkle generously with sesame seeds and a flurry of sliced green onions. Serve right away to preserve that legendary contrast of crispy exterior and saucy coating.
What’s On Your Plate? A Nutritional Snapshot
Knowledge is power, even with indulgent fakeout meals. Estimates are per serving (based on 4 servings).
- Calories: ~480 kcal
- Protein: 32g (A substantial 64% of the average daily need)
- Total Fat: 22g
- Saturated Fat: 5g
- Carbohydrates: 38g
- Dietary Fiber: <1g
- Sugars: 24g (primarily from the sweet chilli sauce and honey)
- Sodium: ~1100mg
Data Insight: While this is an indulgent dish, the high protein content from the chicken promotes significant satiety, which can help prevent overeating. The sugar and sodium are concentrated in the sauce. Using a reduced-sodium soy sauce and slightly less honey can lower these values without drastically impacting flavor.
Healthier Twists on Your Fakeout Favorite
Craving the flavor but want a lighter touch? Here are expert modifications.
- For Oven-Baking: For a hands-off, lower-fat method, toss the coated chicken in 2 tbsp of oil and bake on a wire rack set on a baking sheet at 425°F (220°C) for 18-22 minutes, flipping halfway. Then toss in the sauce.
- For Air Frying: This method yields excellent crispiness with minimal oil. Spray the coated chicken with oil and air fry at 400°F (200°C) for 10-12 minutes, shaking halfway.
- Sugar-Conscious Glaze: Reduce honey to 1 tbsp and use a no-sugar-added sweet chilli sauce. Add a pinch of xanthan gum (1/8 tsp) to the simmering sauce to help it thicken and cling.
- Gluten-Free Guarantee: Use tamari instead of soy sauce and ensure your cornstarch and sweet chilli sauce are certified gluten-free.
- Leaner Protein: Use chicken breast and bake or air fry as directed above.
- Veggie-Powered: Add broccoli florets, bell peppers, or snap peas to the sauce in the last minute of simmering for a one-pan meal.
Serving Suggestions: Build Your Perfect Takeout Box at Home
The beauty of this dish is its versatility.
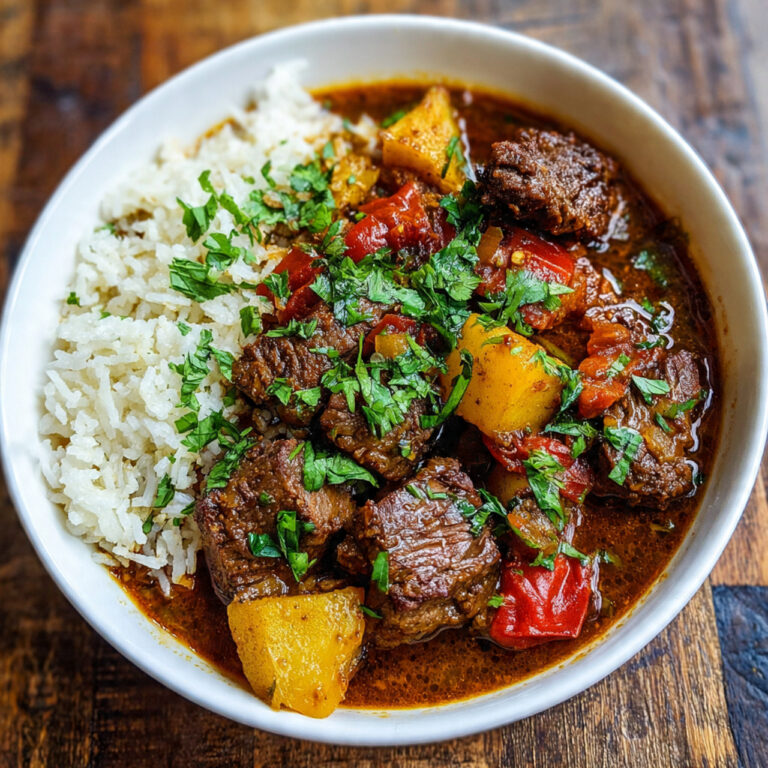
- The Classic Fakeout Combo: Serve over a bed of fluffy white or brown rice with a side of simple steamed broccoli.
- For a Hearty Bowl: Create a grain bowl with rice, the crispy chicken, shredded cabbage, julienned carrots, cucumber slices, and extra green onion.
- As an Appetizer: Serve smaller pieces on skewers or in a bowl with toothpicks for game day or parties—it will disappear instantly.
- Low-Carb/Keto: Serve alongside cauliflower rice and sautéed bok choy or broccoli.
- The Ultimate Leftover Hack: The next day, chop any leftover chicken and toss it into a fresh green salad with a ginger-sesame dressing for a fantastic lunch.
Common Mistakes That Can Deflate Your Crisp
Avoid these pitfalls to guarantee success.
- Wrong Oil Temperature: Too low (below 325°F) and the chicken absorbs oil, becoming greasy. Too high (above 375°F) and the coating burns before the chicken cooks through. A thermometer is your best friend.
- Crowding the Pot: Adding too much chicken at once causes the oil temperature to plummet, leading to soggy, oily chicken. Fry in small, manageable batches.
- Using a Wet Bowl for Serving: Never put crispy fried food directly on a plate or in a bowl that might have condensation. Always use a wire rack or a paper-towel-lined plate for draining, and a dry serving dish.
- Over-Saucing: Tossing the chicken in too much sauce too far in advance will soften the crispy coating. Sauce it just before serving for the ideal textural contrast.
- Skipping the Cornstarch: All-purpose flour alone will give you a denser, bread-like coating. Cornstarch is essential for that light, shattering crisp.
Storing & Reheating Like a Pro
Leftovers? Here’s how to handle them.
- Storing: Store leftover sauced chicken and sauce separately in airtight containers in the fridge for up to 3 days.
- Reheating for Best Crispiness: The microwave is the enemy of crisp. Reheat sauced chicken in an air fryer at 375°F for 3-4 minutes or in a conventional oven at 400°F on a wire rack for 5-7 minutes. If the chicken is unsauced, it will reheat even crispier.
- Freezing: Freeze unsauced, cooked crispy chicken on a baking sheet before transferring to a freezer bag. Reheat from frozen in the oven at 400°F for 10-15 minutes, then toss in freshly made sauce.
Conclusion
This Crispy Sweet Chilli Chicken Recipe proves you can master takeout favorites at home. The keys are a cornstarch coating, precise frying, and a balanced, glossy sauce. In 30 minutes, you’ll have a dish that’s crispier, fresher, and more affordable than delivery.
Ready to become your own favorite takeout joint? Try this recipe and taste the difference. Share your results and any creative twists in the comments below! For more restaurant-style recipes that beat delivery, subscribe to our blog for weekly inspiration.
FAQs: Your Crispy Sweet Chilli Chicken Questions, Answered
Q: Can I bake this Crispy Sweet Chilli Chicken Recipe instead of frying?
A: Absolutely! For a baked version, toss the cornstarch-coated chicken in 2 tablespoons of oil, arrange on a wire rack set over a baking sheet, and bake at 425°F for 18-22 minutes until crisp and cooked. Then toss in the sauce.
Q: My sauce is too thin. How can I thicken it?
A: Let it simmer for an extra 2-3 minutes to reduce. For a quick fix, mix 1 teaspoon of cornstarch with 1 tablespoon of cold water to make a slurry, then whisk it into the simmering sauce for 1 minute until thickened.
Q: Can I use chicken breast instead of thighs?
A: Yes, but breast meat is leaner and can dry out if overcooked. Be vigilant with timing and consider the baking or air frying methods, which are more forgiving than deep-frying for breasts.
Q: Is there a substitute for sweet chilli sauce?
A: In a pinch, you can make a blend of ¼ cup apricot jam or orange marmalade, 2 tbsp soy sauce, 1 tbsp rice vinegar, and ½-1 tsp red pepper flakes, simmered together.
Q: How do I make this recipe gluten-free?
A: Use tamari instead of soy sauce and ensure your cornstarch and sweet chilli sauce are certified gluten-free. The coating is naturally GF if using only cornstarch.
Q: Can I prep this Crispy Sweet Chilli Chicken Recipe ahead of time?
A: You can cut the chicken and mix the dry coating and sauce components ahead of time. For best results, coat and fry the chicken just before serving to preserve the crisp texture.
Crispy Sweet Chilli Chicken Recipe: Best Takeout Fakeout
Skip the delivery app and the soggy disappointment! This Crispy Sweet Chilli Chicken Recipe delivers that iconic takeout crunch and glossy, sweet-spicy glaze in just 30 minutes. Learn the secret to a shatteringly crisp coating and a perfectly balanced sauce that will make this your new weekly favorite.
- Total Time: 30 minutes
- Yield: 4 servings
Ingredients
For the Crispy Chicken:
1.5 lbs boneless, skinless chicken thighs or breasts, cut into 1-inch pieces
⅓ cup cornstarch
¼ cup all-purpose flour
1 tsp baking powder
1 tsp garlic powder
1 tsp onion powder
1 large egg, beaten
½ tsp salt
¼ tsp black pepper
Vegetable or canola oil, for frying
For the Sweet Chilli Glaze:
½ cup sweet chilli sauce
3 tbsp honey
2 tbsp soy sauce
1 tbsp rice vinegar
2 cloves garlic, minced
1 tbsp fresh ginger, grated
1-2 tsp sriracha (adjust to taste)
1 tsp sesame oil
1 tbsp water
For Garnish:
Sesame seeds
Sliced green onions
Instructions
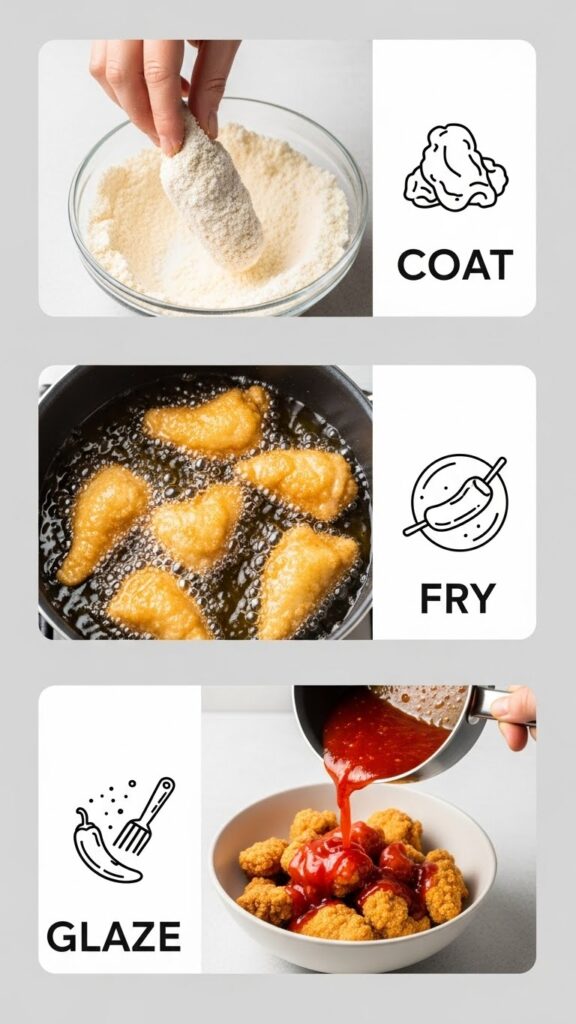
1. Coat the Chicken
Pat the chicken pieces completely dry with paper towels. In a medium bowl, whisk together the cornstarch, flour, baking powder, garlic powder, onion powder, salt, and pepper. Dip each chicken piece into the beaten egg, letting the excess drip off, then dredge thoroughly in the cornstarch mixture, pressing to adhere. Place on a plate.
2. Heat the Oil
Pour oil into a large, heavy-bottomed pot or Dutch oven until it’s about 1.5 inches deep. Heat over medium-high heat to 350°F (175°C). Use a thermometer for accuracy.
3. Fry to Golden Perfection
Working in batches to avoid crowding, carefully add the coated chicken to the hot oil. Fry for 3-4 minutes, turning once, until deeply golden brown, crispy, and cooked through. Transfer the cooked chicken to a wire rack set over a baking sheet (this keeps it crispy).
4. Make the Glaze
While the chicken fries, make the sauce. In a small saucepan, combine the sweet chilli sauce, honey, soy sauce, rice vinegar, minced garlic, grated ginger, and sriracha. Whisk over medium heat until it comes to a simmer and thickens slightly, about 3-4 minutes. Remove from heat and stir in the sesame oil and water.
5. Toss & Serve
Once all chicken is fried, ensure it’s still hot. Place it in a large bowl and pour about two-thirds of the warm glaze over it. Toss gently until every piece is evenly coated. Transfer to a serving platter, garnish with sesame seeds and green onions, and serve immediately.
Notes
For the Crispiest Results: Let the coated chicken sit for 5-10 minutes before frying. This helps the coating set and adhere better.
Oil Temperature is Key: A kitchen thermometer is the best tool for success. If the oil is too cool, the chicken will be greasy; too hot, and it will burn.
Baking/Air Frying Option: For a lighter version, toss the coated chicken in 2 tbsp of oil. Bake at 425°F on a wire rack for 18-22 minutes, or air fry at 400°F for 10-12 minutes, until crisp. Then toss in the sauce.
Make it Gluten-Free: Use tamari instead of soy sauce and ensure your cornstarch and sweet chilli sauce are certified gluten-free.
Sauce Consistency: If your sauce is too thick, add another tablespoon of water. If it’s too thin, let it simmer for another minute or two.
- Prep Time: 15 minutes
- Cook Time: 15 minutes
- Category: Main Dish
- Method: Frying
- Cuisine: Asian Fusion
- Diet: Gluten Free