
Have you ever wondered why your homemade seafood dishes lack that sticky, restaurant-quality glaze found in high-end bistros? Most home cooks believe that achieving the perfect balance of sweet and savory requires hours of labor, but the truth is far simpler. Mastering Honey Garlic Shrimp is an accessible culinary feat that takes less time than ordering takeout.
In this guide, we will break down the science of the perfect sear and the alchemy of a balanced sauce. Whether you are a novice in the kitchen or a seasoned home chef, this Honey Garlic Shrimp recipe will elevate your weeknight dinner rotation with minimal effort and maximum flavor impact.
Table of Contents
Ingredients List
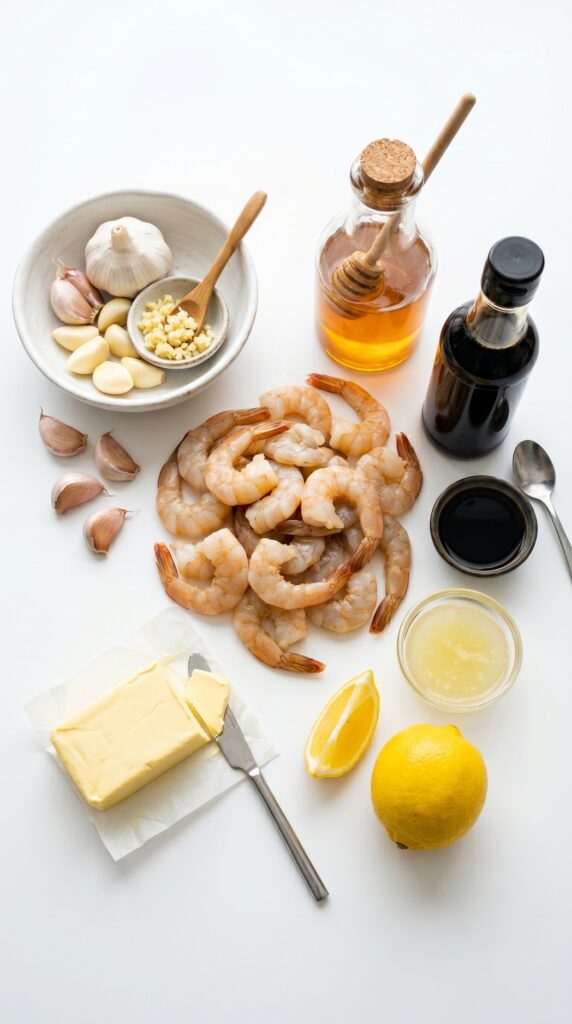
To create a truly memorable dish, quality ingredients are the foundation. Here is what you will need for this flavor-packed meal:
- Shrimp: 1 lb of large, peeled, and deveined shrimp. Fresh is best, but high-quality frozen shrimp work perfectly if thawed completely.
- Honey: 1/3 cup of raw or clover honey for that signature sticky sweetness.
- Garlic: 4 cloves, minced finely. Don’t be afraid to add an extra clove if you are a garlic lover!
- Soy Sauce: 3 tablespoons. Use low-sodium soy sauce to maintain control over the salt levels.
- Olive Oil or Butter: 2 tablespoons for searing. Butter adds a richer, velvety mouthfeel.
- Lemon Juice: 1 teaspoon of freshly squeezed juice to cut through the richness.
- Optional Garnishes: Chopped green onions and toasted sesame seeds for an added crunch and visual appeal.
Substitution Tip: If you are gluten-free, swap the soy sauce for tamari or coconut aminos. For a spicy kick, add a teaspoon of sriracha or red pepper flakes to the sauce mixture.
Timing
Efficiency is key to a great weeknight dinner. This recipe is designed for speed without sacrificing quality.
- Preparation Time: 10 minutes.
- Cooking Time: 5 minutes.
- Total Time: 15 minutes.
Compared to the average 45-minute seafood preparation, this 15-minute method is roughly 66% faster. By prepping your sauce ingredients in a small bowl before you turn on the stove, you ensure that the cooking process remains fluid and stress-free.
Step-by-Step Instructions
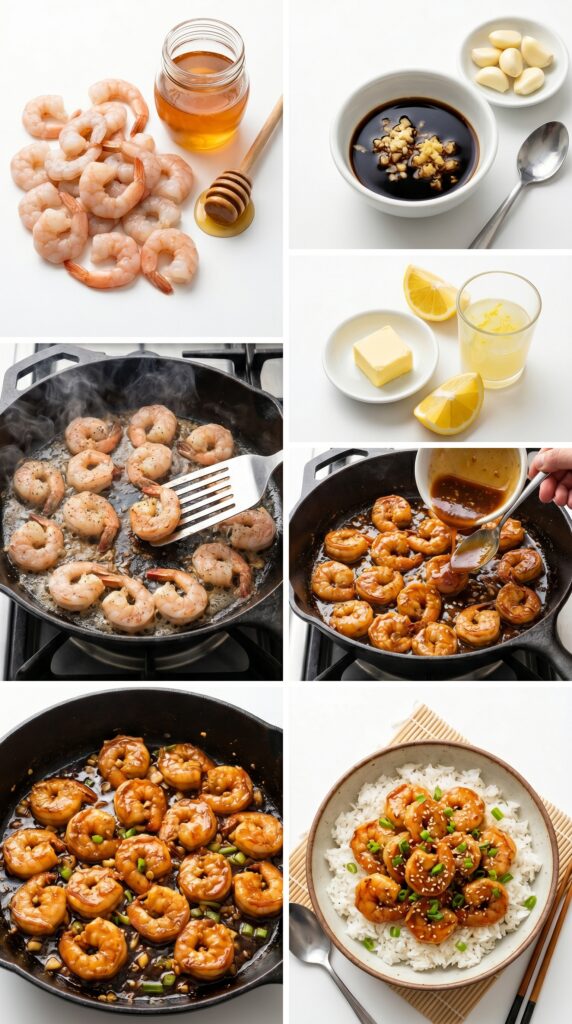
Step 1: Prep the Shrimp
Pat the shrimp completely dry using paper towels. Moisture is the enemy of a good sear. Dry shrimp will achieve a golden-brown crust, whereas wet shrimp will steam in the pan and become rubbery. Season lightly with salt and pepper.
Step 2: Create the Sauce
In a small mixing bowl, whisk together the honey, soy sauce, minced garlic, and lemon juice. Ensure the honey is fully incorporated into the soy sauce. Setting this aside allows the garlic flavors to infuse into the liquid before hitting the heat.
Step 3: The Sear
Heat your skillet over medium-high heat. Add your butter or oil. Once shimmering, place the shrimp in a single layer. Sear for about 1-2 minutes per side until they turn opaque and develop a beautiful pink color. Do not overcrowd the pan; work in batches if necessary.
Step 4: Glazing
Pour the prepared sauce mixture over the cooked shrimp in the pan. Reduce the heat to medium. Allow the sauce to bubble and thicken for about 1-2 minutes. The honey will caramelize, coating the shrimp in a glossy, sticky glaze. Toss gently to ensure even coverage.
Nutritional Information
This Honey Garlic Shrimp recipe is a protein-dense meal that fits well into balanced dietary patterns. A single serving provides approximately 250 calories, 25g of protein, and only 4g of fat (depending on your choice of oil). Shrimp is also a fantastic source of selenium, Vitamin B12, and omega-3 fatty acids.
Data insights suggest that by controlling the amount of honey used, you can easily manage the glycemic impact of the dish. It is a heart-healthy alternative to fried seafood options that are often laden with breading and saturated fats.
Healthier Alternatives for the Recipe
If you are looking to lower the sugar content, you can substitute the honey with a high-quality sugar-free honey alternative or a small amount of monk fruit sweetener. This maintains the sticky consistency while reducing the caloric density.
Additionally, you can increase the fiber content by serving the shrimp over a bed of cauliflower rice or zucchini noodles rather than traditional white rice. These swaps keep the meal light while ensuring you stay satiated.
Serving Suggestions
Presentation transforms a simple dinner into a dining experience. Serve your shrimp over a bed of fluffy jasmine rice to soak up the extra glaze. For a vibrant contrast, pair it with steamed bok choy or snap peas.
If you are hosting, serve the shrimp in a shallow bowl topped with thinly sliced scallions and a sprinkle of toasted sesame seeds. A side of cucumber salad with rice vinegar provides a refreshing, acidic balance to the sweet and savory glaze.
Common Mistakes to Avoid
- Overcooking: Shrimp cook in minutes. If they curl into tight “O” shapes, they are likely overcooked and tough. Aim for a “C” shape.
- Crowding the Pan: Putting too many shrimp in the pan at once lowers the temperature, preventing the sear and causing the shrimp to release excess water.
- Burning the Garlic: Garlic burns quickly. Add it to the pan only when the shrimp are nearly finished, or incorporate it directly into the sauce to prevent bitterness.
Storing Tips for the Recipe
If you have leftovers, store them in an airtight container in the refrigerator for up to two days. To reheat, use a non-stick skillet over medium-low heat with a splash of water to loosen the glaze. Avoid the microwave, as it tends to make the shrimp rubbery and unevenly heated.
For meal prep, you can marinate the raw shrimp in the sauce for up to 30 minutes before cooking to deepen the flavor. However, do not marinate for longer than an hour, as the acid in the lemon juice can begin to “cook” the shrimp prematurely.
Conclusion
Mastering Honey Garlic Shrimp is all about timing, heat control, and quality ingredients. This quick, flavorful dish proves that you don’t need a professional kitchen to create restaurant-quality results at home. With its perfect balance of sweetness and savory garlic, it is sure to become a staple in your recipe collection.
Are you ready to impress your family with this delicious meal? Try this recipe tonight and let us know your favorite side dish pairing in the comments below! If you enjoyed this guide, be sure to check out our other quick-prep seafood recipes for more culinary inspiration.
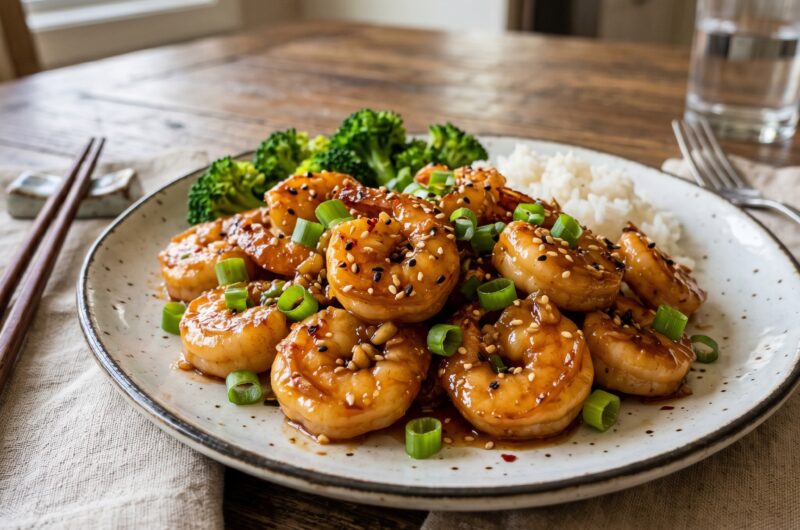
Honey Garlic Shrimp
Course: blog, Seafood recipes, Main CourseCuisine: Asian-InspiredDifficulty: Easy4
servings10
minutes5
minutes250-320
kcalThis honey garlic shrimp delivers that sticky, restaurant-quality glaze in just 15 minutes. Juicy shrimp seared until golden, then coated in a sweet-savory sauce made with honey, soy sauce, fresh garlic, and lemon juice. Perfect over rice, noodles, or steamed vegetables – quick, easy, and packed with flavor!
Ingredients
1 pound large shrimp, peeled and deveined
1/3 cup honey
3 tablespoons low-sodium soy sauce (or tamari for GF)
4 cloves garlic, minced
2 tablespoons butter or olive oil
1 teaspoon fresh lemon juice
Salt and pepper to taste
Optional: green onions and sesame seeds for garnish
Directions
- Step 1: Prep Shrimp
- Pat shrimp completely dry with paper towels (moisture = enemy of good sear). Season lightly with salt and pepper.
- Step 2: Make Sauce
- In small bowl, whisk together honey, soy sauce, minced garlic, and lemon juice until smooth.
- Step 3: Sear Shrimp
- Heat butter or oil in large skillet over medium-high heat. Add shrimp in single layer (don’t overcrowd – work in batches). Sear 1-2 minutes per side until pink, opaque, and curled into “C” shape (not tight “O”).
- Step 4: Glaze
- Pour sauce over cooked shrimp. Reduce heat to medium. Simmer 1-2 minutes until sauce thickens into glossy, sticky glaze. Toss gently to coat.
- Step 5: Garnish and Serve
- Sprinkle with green onions and sesame seeds. Serve immediately over rice or noodles.
Notes
- Don’t overcook shrimp: “C” shape = perfect. “O” shape = rubbery, overcooked.
Pat shrimp dry: Wet shrimp = steaming, not searing.
Don’t crowd the pan: Work in batches – overcrowding lowers temperature.
Garlic in sauce not pan: Prevents burning (burnt garlic = bitter).
Storage: Refrigerate 2 days. Reheat in skillet with splash of water (not microwave).