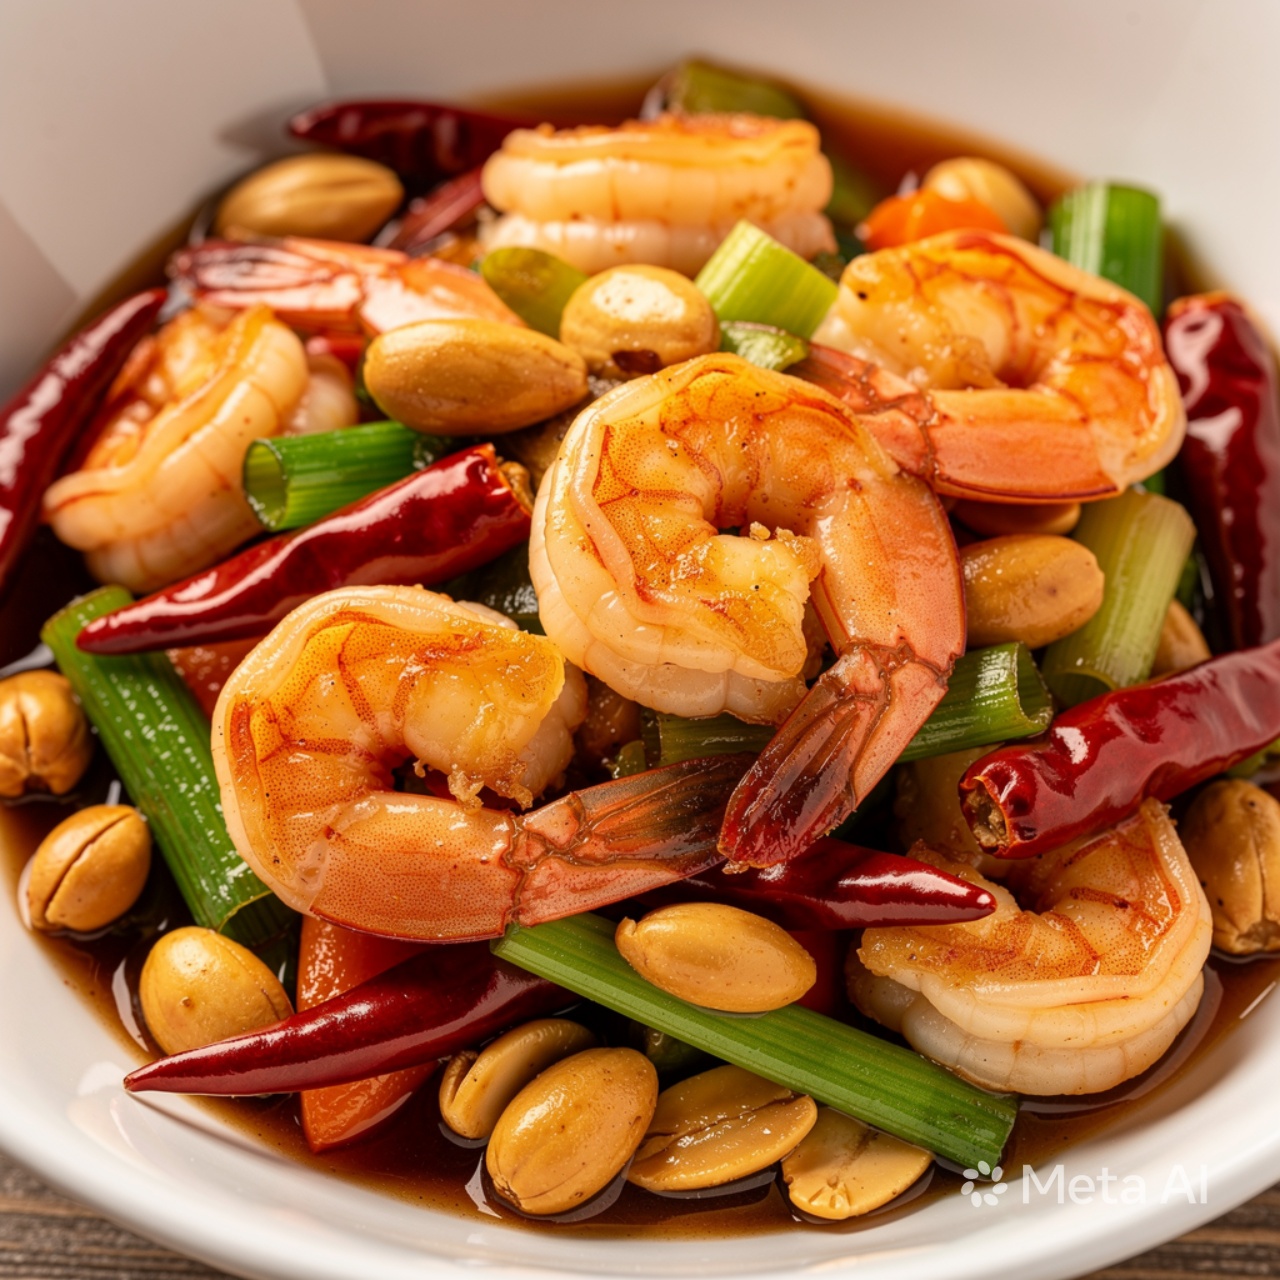
Kung Pao Shrimp – Spicy, Savory & Better Than Takeout
Have you ever wondered why your homemade stir-fry never quite captures that authentic, mouth-numbing heat you find at your favorite local bistro? Most home cooks assume they need a commercial-grade wok to achieve professional results, but the secret actually lies in the balance of your aromatics and sauce. Today, we are mastering the art of Kung Pao Shrimp, a dish that proves you don’t need to order takeout to enjoy a complex, restaurant-quality meal at home.
This Kung Pao Shrimp recipe is designed to be faster, fresher, and significantly more flavorful than anything delivered to your doorstep. By controlling the quality of your ingredients and the intensity of the heat, you can elevate this classic Szechuan-inspired dish into your new weeknight favorite. Let’s dive into how you can achieve that perfect glossy glaze and satisfying crunch in under 30 minutes.
Table of Contents
Ingredients List
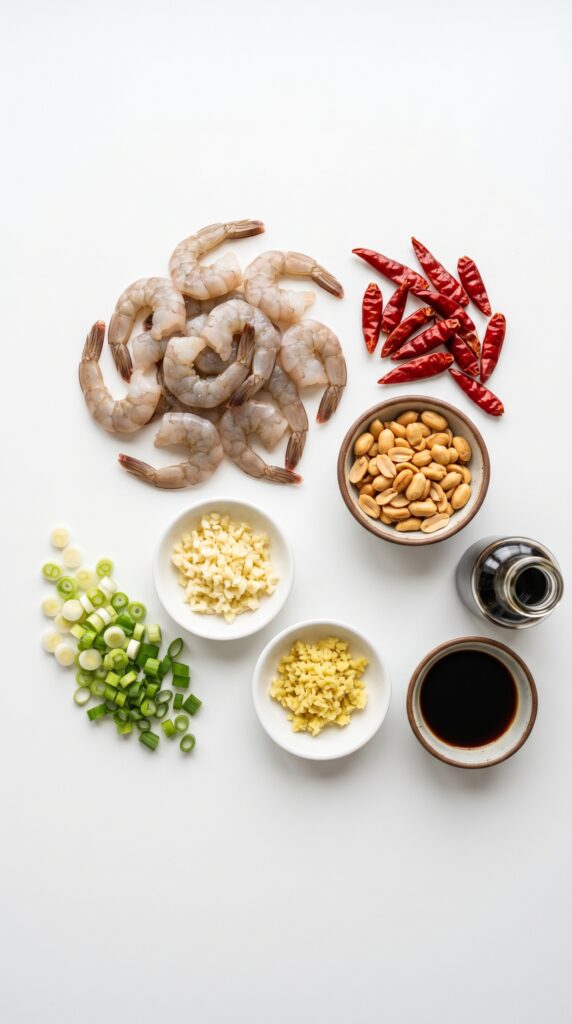
To create the perfect flavor profile, you need a balance of salty, sweet, and spicy elements. Here is what you will need for your kitchen adventure:
- 1 lb Large Shrimp: Peeled and deveined. You can substitute with firm tofu for a vegetarian twist.
- 1/2 cup Roasted Peanuts: These provide the signature crunch. Cashews are a great alternative if you prefer a creamier texture.
- 4-6 Dried Red Chilies: These are essential for the authentic Szechuan heat.
- Aromatics: 2 cloves of minced garlic, 1 tablespoon of fresh grated ginger, and 3 stalks of sliced green onions.
- The Sauce: 2 tablespoons soy sauce, 1 tablespoon black vinegar (or balsamic), 1 teaspoon sesame oil, and 1 teaspoon cornstarch for thickening.
- Vegetable Oil: For high-heat stir-frying.
Timing
Efficiency is key in stir-fry cooking. This recipe takes approximately 10 minutes of prep time and 10 minutes of active cooking time, totaling just 20 minutes.
This is roughly 40% faster than the average restaurant wait time, meaning you can have a gourmet meal on the table before the delivery driver even leaves the parking lot.
Step-by-Step Instructions

Step 1: Marinate the Shrimp
In a medium bowl, toss your shrimp with a splash of soy sauce and a pinch of cornstarch. This technique, known as “velveting,” ensures the shrimp remains succulent and tender while protecting it from the intense heat of the pan.
Step 2: Prepare the Sauce
Whisk together your soy sauce, vinegar, sesame oil, and cornstarch in a small jar. Having your sauce ready to pour is the secret to preventing overcooked ingredients. This preparation step ensures your Kung Pao Shrimp maintains its vibrant color and texture.
Step 3: Sear the Aromatics
Heat your wok or heavy-bottomed skillet over high heat until it begins to smoke slightly. Add the oil, followed by the dried chilies, garlic, and ginger. Stir-fry for only 30 seconds until fragrant; be careful not to burn the garlic, as it turns bitter quickly.
Step 4: Cook the Shrimp
Add the shrimp to the pan in a single layer. Let them sear undisturbed for 60 seconds to develop a golden crust. Flip and cook for another minute until they are just opaque. Overcooking is the most common mistake, so keep a close eye on the color.
Step 5: The Final Toss
Pour your sauce mixture into the pan. It will bubble and thicken instantly. Toss in the roasted peanuts and green onions. Stir vigorously for 30 seconds to coat everything in that glossy, savory glaze, then remove from heat immediately.
Nutritional Information
A standard serving of this dish provides approximately 320 calories, 28g of protein, and 12g of healthy fats. By using lean shrimp, you are getting high-quality protein with minimal saturated fat. Data suggests that incorporating lean seafood into your diet twice a week can significantly improve cardiovascular health compared to red meat alternatives.
Healthier Alternatives for the Recipe
If you are looking to reduce sodium, replace the soy sauce with coconut aminos. To increase the fiber content, toss in extra bell peppers or snap peas during the final stir-fry stage. These additions add volume and essential micronutrients without compromising the integrity of the classic spicy profile.
Serving Suggestions
Serve your creation over a bed of fluffy jasmine rice or steamed quinoa to soak up the extra sauce. For a low-carb option, serve it over cauliflower rice. I personally love adding a side of smashed cucumber salad to provide a cooling, crunchy contrast to the heat of the Kung Pao Shrimp.
Common Mistakes to Avoid
- Crowding the Pan: If you add too much at once, the temperature drops, and the shrimp will steam instead of sear. Work in batches if necessary.
- Ignoring the Heat: Stir-frying requires high heat. If you are afraid of the flame, the sauce won’t caramelize properly.
- Using Raw Peanuts: Always use pre-roasted peanuts. Raw peanuts will not provide the necessary texture and will taste “earthy” rather than nutty.
Storing Tips for the Recipe
If you have leftovers, store them in an airtight container in the refrigerator for up to two days. To reheat, use a non-stick pan over medium heat with a tiny splash of water. This helps revive the sauce without turning the shrimp rubbery. Avoid the microwave, as it tends to cook the shrimp unevenly.
Conclusion
Mastering this dish is all about timing, heat control, and high-quality ingredients. By following these steps, you’ve successfully elevated your home cooking and created a meal that rivals any professional kitchen. You now have the skills to whip up this spicy, savory classic whenever the craving strikes.
Did you try this recipe? We would love to hear your thoughts! Leave a comment below with your favorite modifications, or share this post with a friend who needs to upgrade their dinner game. Don’t forget to explore our other stir-fry guides for more inspiration!

Kung Pao Shrimp – Spicy, Savory & Better Than Takeout
Course: blogCuisine: ChineseDifficulty: Easy4
servings10
minutes10
minutes320
kcalThis kung pao shrimp delivers authentic Szechuan heat and flavor faster than delivery – ready in just 20 minutes. Succulent shrimp wok-seared with dried red chilies, garlic, ginger, roasted peanuts, and green onions in a glossy savory sauce. Better than takeout, fresher, and fully customizable. Serve over jasmine rice for a quick, spicy weeknight dinner!
Ingredients
1 pound large shrimp, peeled and deveined
1/2 cup roasted peanuts (or cashews)
4-6 dried red chilies (Szechuan or arbol)
2 cloves garlic, minced
1 tablespoon fresh ginger, grated
3 stalks green onions, sliced
2 tablespoons soy sauce (or tamari for GF)
1 tablespoon black vinegar (or balsamic vinegar)
1 teaspoon sesame oil
1 teaspoon cornstarch
2 tablespoons vegetable oil (for cooking)
Optional: 1 teaspoon Sichuan peppercorns for numbing heat
Directions
- Step 1: Marinate Shrimp
- In bowl, toss shrimp with splash of soy sauce and pinch of cornstarch (velveting – keeps shrimp tender).
- Step 2: Make Sauce
- Whisk together soy sauce, black vinegar, sesame oil, and cornstarch in small bowl.
- Step 3: Sear Aromatics
- Heat wok or skillet over high heat until smoking slightly. Add vegetable oil, then dried chilies, garlic, ginger, and Sichuan peppercorns (if using). Stir-fry 30 seconds until fragrant (don’t burn garlic).
- Step 4: Cook Shrimp
- Add shrimp in single layer. Sear undisturbed 60 seconds for golden crust. Flip and cook 1 more minute until just opaque.
- Step 5: Toss and Finish
- Pour sauce into pan – it will bubble and thicken instantly. Add roasted peanuts and green onions. Stir vigorously 30 seconds to coat. Remove from heat immediately.
- Step 6: Serve
- Serve immediately over jasmine rice.
Notes
- Don’t overcrowd pan: Overcrowding = steaming, not searing. Work in batches if needed.
Don’t burn garlic: Aromatics cook fast – 30 seconds max. Burnt garlic = bitter.
Don’t overcook shrimp: Remove when just opaque – carries over heat.
Use roasted peanuts: Raw peanuts taste earthy, won’t get crunchy.
Storage: Refrigerate 2 days. Reheat in pan with splash of water (not microwave).