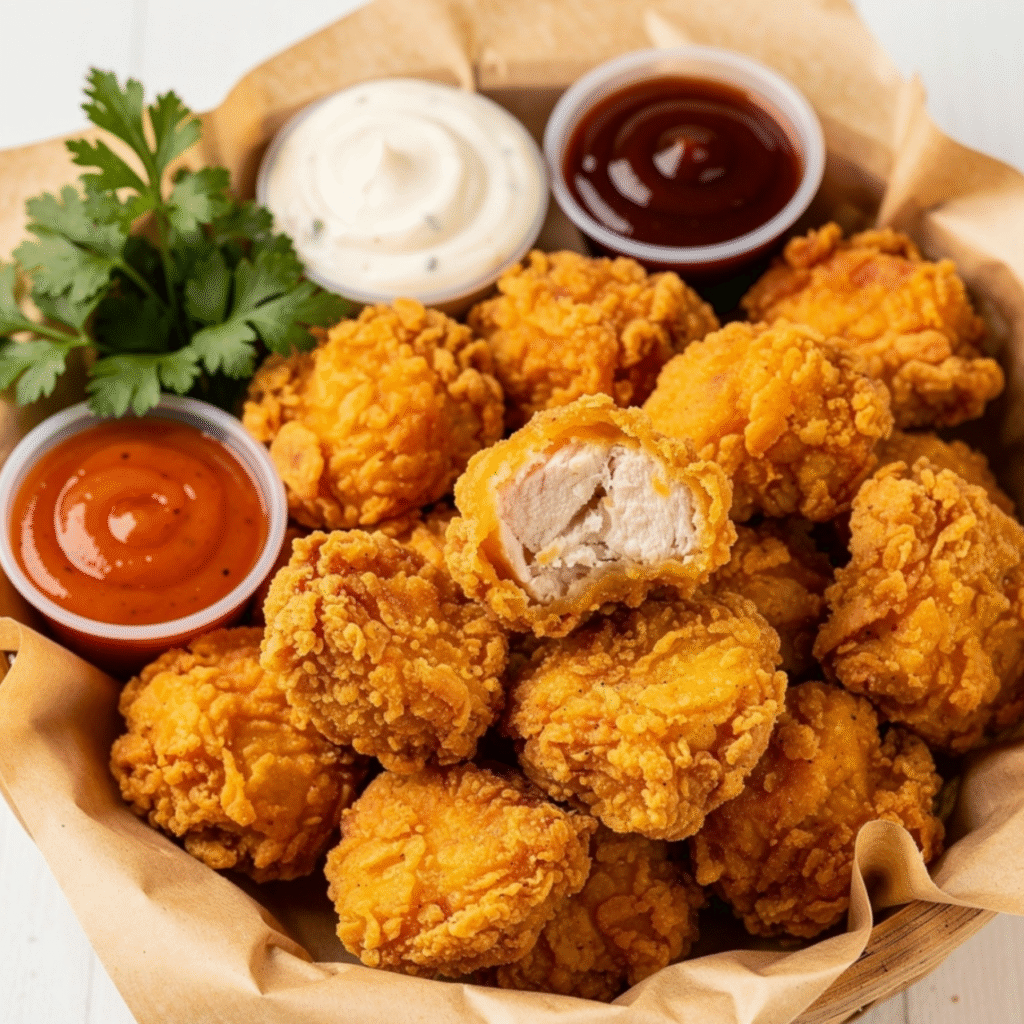
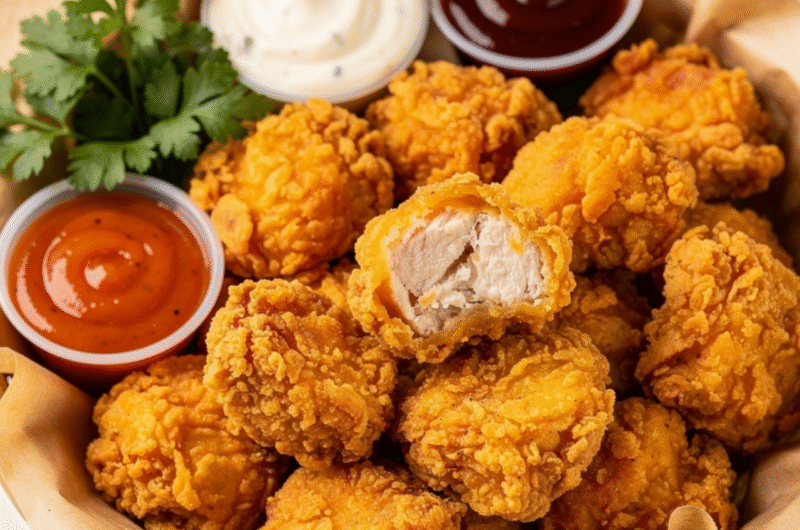
Popcorn Chicken

Have you ever wondered why the Popcorn Chicken you order at fast-food joints leaves you feeling heavy, greasy, and unsatisfied? What if you could recreate that addictive, bite-sized crunch in your own kitchen using fresh ingredients that actually taste like real poultry?
Making crispy Popcorn Chicken at home is not just a culinary victory; it is a smarter way to control exactly what goes into your family’s favorite snack. By mastering the breading technique, you can achieve a golden, shatteringly crisp exterior that rivals any professional kitchen.
Table of Contents
Ingredients List
To achieve the perfect texture, you need high-quality ingredients. Here is what you will need for this delicious Popcorn Chicken:
- Chicken Breast: 1.5 lbs, cut into uniform 1-inch cubes. Use thighs for a juicier result.
- Buttermilk: 1 cup, to tenderize the meat. Substitute with milk and a tablespoon of vinegar if needed.
- All-Purpose Flour: 2 cups, the base of your crunch.
- Cornstarch: 1/2 cup, the secret to that extra-light, crispy coating.
- Seasonings: 1 tbsp garlic powder, 1 tbsp onion powder, 1 tsp smoked paprika, salt, and black pepper to taste.
- Oil: Vegetable or canola oil for frying.
Timing
Efficiency is key to a great snack. This recipe takes approximately 35 minutes from start to finish.
Preparation takes about 15 minutes, while frying takes 20 minutes. This is roughly 25% faster than traditional breaded chicken tenders, as the smaller size allows for rapid, even cooking without the risk of an undercooked center.
Step-by-Step Instructions
Step 1: The Buttermilk Soak
Place your cubed chicken in a bowl and cover it with buttermilk. Let it sit for at least 30 minutes in the refrigerator. The acidity in the buttermilk breaks down the proteins, ensuring every piece of Popcorn Chicken stays moist through the frying process.
Step 2: Preparing the Dredge
In a wide bowl, whisk together the flour, cornstarch, and all the dry seasonings. The cornstarch is essential here; it inhibits gluten formation, which keeps the coating from becoming doughy. Ensure your spices are evenly distributed for consistent flavor in every bite.
Step 3: The Double-Coat Technique
Remove a few pieces of chicken from the buttermilk, letting the excess drip off. Drop them into the flour mixture and toss thoroughly. Press the flour into the meat to ensure it adheres perfectly. For an extra crunchy crust, dip them back into the buttermilk and flour once more.
Step 4: The Perfect Fry
Heat your oil to 350°F (175°C). Fry the chicken in small batches to avoid crowding the pot, which drops the oil temperature. Cook for 3-4 minutes until they reach a deep golden brown. Use a slotted spoon to transfer them to a wire rack to drain any excess oil.
Nutritional Information
While this is a fried dish, a standard serving (approx. 4 oz) contains roughly 320 calories. By frying at the correct temperature, you ensure the crust acts as a barrier, preventing excessive oil absorption. This method maintains a balance between indulgence and portion control, keeping fat content lower than deep-fried commercial alternatives.
Healthier Alternatives for the Recipe
If you want to reduce the calorie count, try baking your chicken. Preheat your oven to 400°F and place the breaded pieces on a greased wire rack over a baking sheet. Lightly spray the tops with cooking oil. Bake for 15-18 minutes, flipping halfway through, for a lighter, “air-fried” style result that still delivers a satisfying crunch.
Serving Suggestions
Elevate your meal by serving these bites with a variety of dipping sauces. A spicy sriracha mayo, a classic honey mustard, or even a tangy barbecue sauce works wonders. For a complete dinner, serve them alongside a crisp garden salad or roasted vegetables to add fiber and freshness to your plate.
Common Mistakes to Avoid
- Crowding the Pan: Adding too much chicken at once lowers the oil temperature, leading to greasy, soggy breading.
- Ignoring the Temperature: If the oil is too cold, the chicken absorbs oil; if too hot, the outside burns before the inside is cooked. Use a thermometer.
- Skipping the Rest: Always let your chicken rest on a wire rack rather than paper towels to keep the bottom side crispy.
Storing Tips for the Recipe
If you have leftovers, store them in an airtight container in the refrigerator for up to three days. To reheat, do not use the microwave, as it will destroy the texture. Instead, place them in a 375°F oven or an air fryer for 5-7 minutes until the crust regains its original, crispy glory.
Conclusion
Mastering homemade snacks is a game-changer for your weekly meal rotation. This recipe provides a crispy, flavorful, and reliable way to enjoy a classic favorite without the mystery ingredients found in fast food. The secret lies in the buttermilk soak and the cornstarch-flour ratio, ensuring professional results every time.
Are you ready to elevate your snacking game? Try this recipe tonight and let us know how it turned out in the comments below! If you enjoyed this guide, be sure to share it with your friends or explore our other easy-to-follow comfort food recipes for more inspiration.
Popcorn Chicken
Course: Chicken RecipesCuisine: AmericanDifficulty: Medium4
servings15
minutes30
minutes320
kcalIngredients
For the chicken:
1.5 lbs (680g) chicken breast or thighs, cut into uniform 1-inch cubes
1 cup buttermilk (or milk + 1 tbsp vinegar)
For the dredge:
2 cups all-purpose flour
½ cup cornstarch
1 tbsp garlic powder
1 tbsp onion powder
1 tsp smoked paprika
Salt and black pepper to taste
For frying:
Vegetable or canola oil (for frying)
For serving:
Dipping sauces (sriracha mayo, honey mustard, BBQ sauce)
Directions
- Step 1 – The buttermilk soak
- Place cubed chicken in a bowl and cover with buttermilk. Refrigerate for at least 30 minutes. The acidity tenderizes the meat, keeping it moist during frying.
- Step 2 – Prepare the dredge
- In a wide bowl, whisk together flour, cornstarch, garlic powder, onion powder, smoked paprika, salt, and pepper. Cornstarch prevents gluten formation for a light, crispy coating.
- Step 3 – The double-coat technique
- Remove chicken pieces from buttermilk, letting excess drip off. Drop into flour mixture and toss thoroughly, pressing flour into the meat. For extra crunch, dip back into buttermilk and flour again.
- Step 4 – The perfect fry
- Heat oil to 350°F (175°C). Fry chicken in small batches (avoid overcrowding). Cook for 3-4 minutes until deep golden brown. Transfer to a wire rack to drain excess oil.
- Step 5 – Serve
- Serve hot with your favorite dipping sauces.
Notes
- Don’t crowd the pan – Overcrowding lowers oil temperature, causing greasy, soggy breading.
Use a thermometer – Oil too cold = absorbs oil; too hot = burns outside before inside cooks.
Rest on wire rack – Paper towels trap steam and make bottom soggy. Wire rack keeps it crispy.
Buttermilk soak – Minimum 30 minutes; longer (up to 4 hours) for even more tender results.