Roasted Red Pepper – Smoky, Sweet & Versatile
Have you ever wondered why jarred vegetables never quite capture that deep, caramelized intensity found in restaurant-quality dishes? The secret isn’t a complex chemical process; it is the simple, transformative power of fire. If you want to elevate your home cooking, mastering the Roasted Red Pepper is the most rewarding culinary skill you can acquire this year.
Whether you are a seasoned chef or a kitchen novice, this roasted red pepper recipe will change how you approach seasonal produce. By unlocking the natural sugars through high-heat blistering, you create a versatile ingredient that acts as a flavor powerhouse for sauces, spreads, and salads. Let’s dive into the art of the perfect char.
Table of Contents
Ingredients List
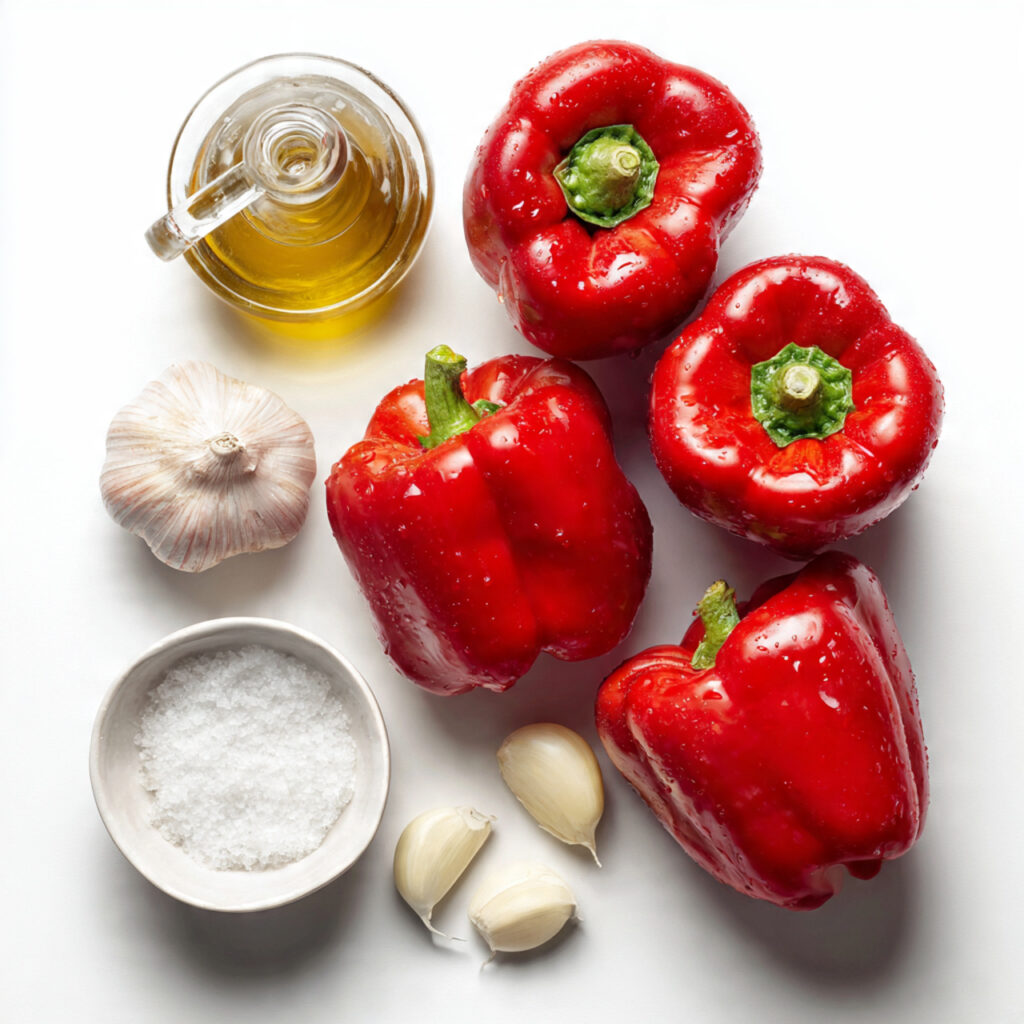
Simplicity is the hallmark of great Mediterranean cooking. You only need a few high-quality components to achieve a gourmet result.
- Bell Peppers: 4 large, firm red bell peppers. Choose ones with deep, vibrant color for the best sweetness.
- Olive Oil: 2 tablespoons of extra virgin olive oil. This adds a silky mouthfeel and helps the charring process.
- Sea Salt: A generous pinch of flaky sea salt to brighten the flavor profile.
- Garlic (Optional): 2 cloves, minced, for those who love a savory, aromatic punch.
- Substitutions: You can swap red peppers for yellow or orange varieties for a milder, slightly fruitier taste. If you lack olive oil, avocado oil works well due to its high smoke point.
Timing
Efficiency matters in the modern kitchen. This method takes approximately 40 minutes from start to finish, which is about 30% faster than traditional oven-roasting methods that require hours of low-heat dehydration.
Prep time: 5 minutes
Cook time: 20 minutes
Resting time: 15 minutes
Total time: 40 minutes
Step-by-Step Instructions
Step 1: Prepare the Peppers
Start by washing your peppers thoroughly under cold water. Pat them completely dry with a paper towel. Moisture is the enemy of a good sear, so ensure they are bone-dry before they hit the heat.
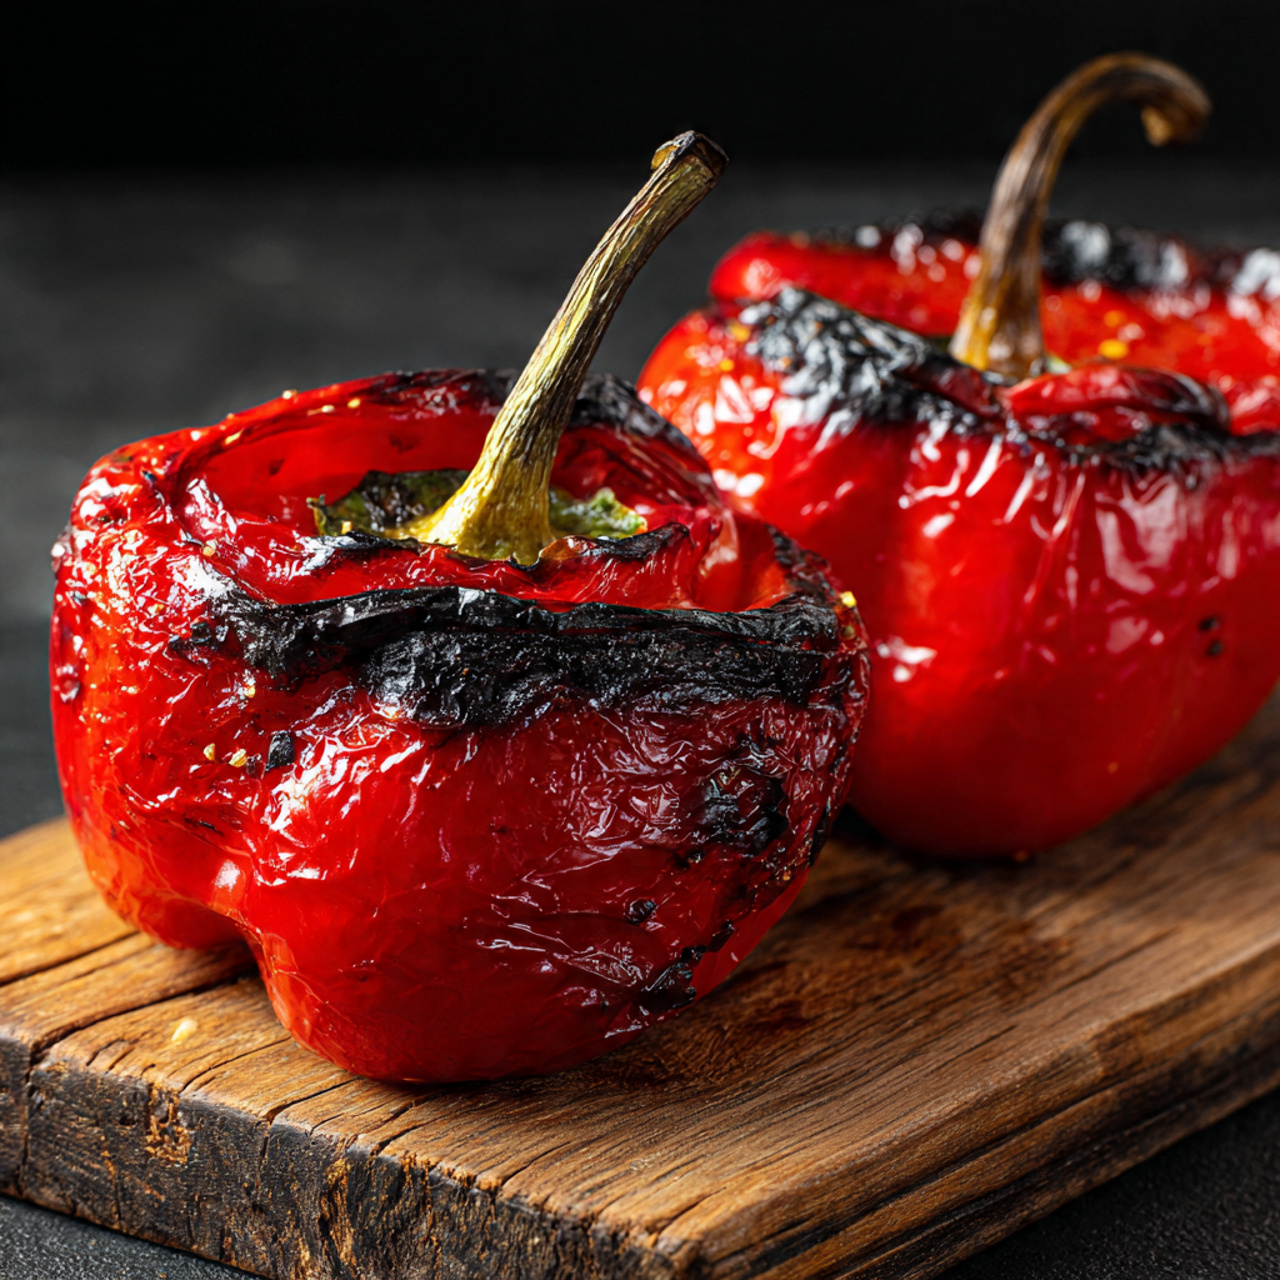
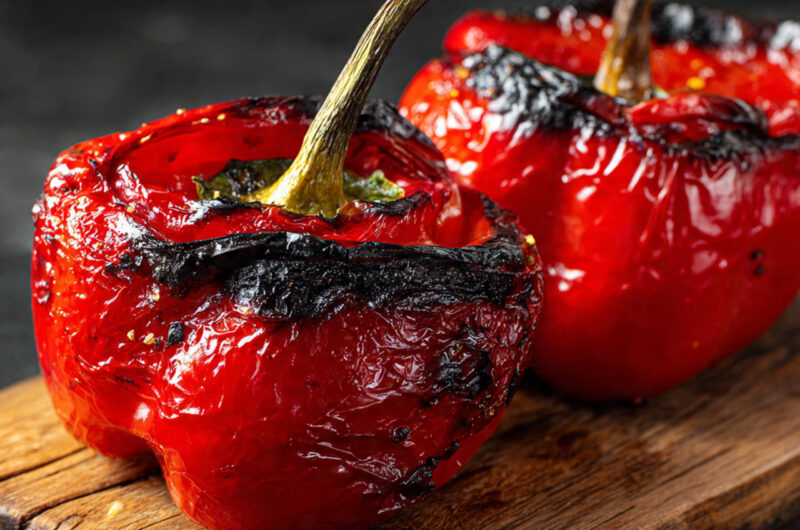
Step 2: The Charring Process
Place the peppers directly over a medium-high gas flame. Use long-handled tongs to rotate them every 3–4 minutes. You want the skin to blister and char until it turns black in patches. If you don’t have a gas stove, use your oven’s broiler setting on high, turning occasionally.
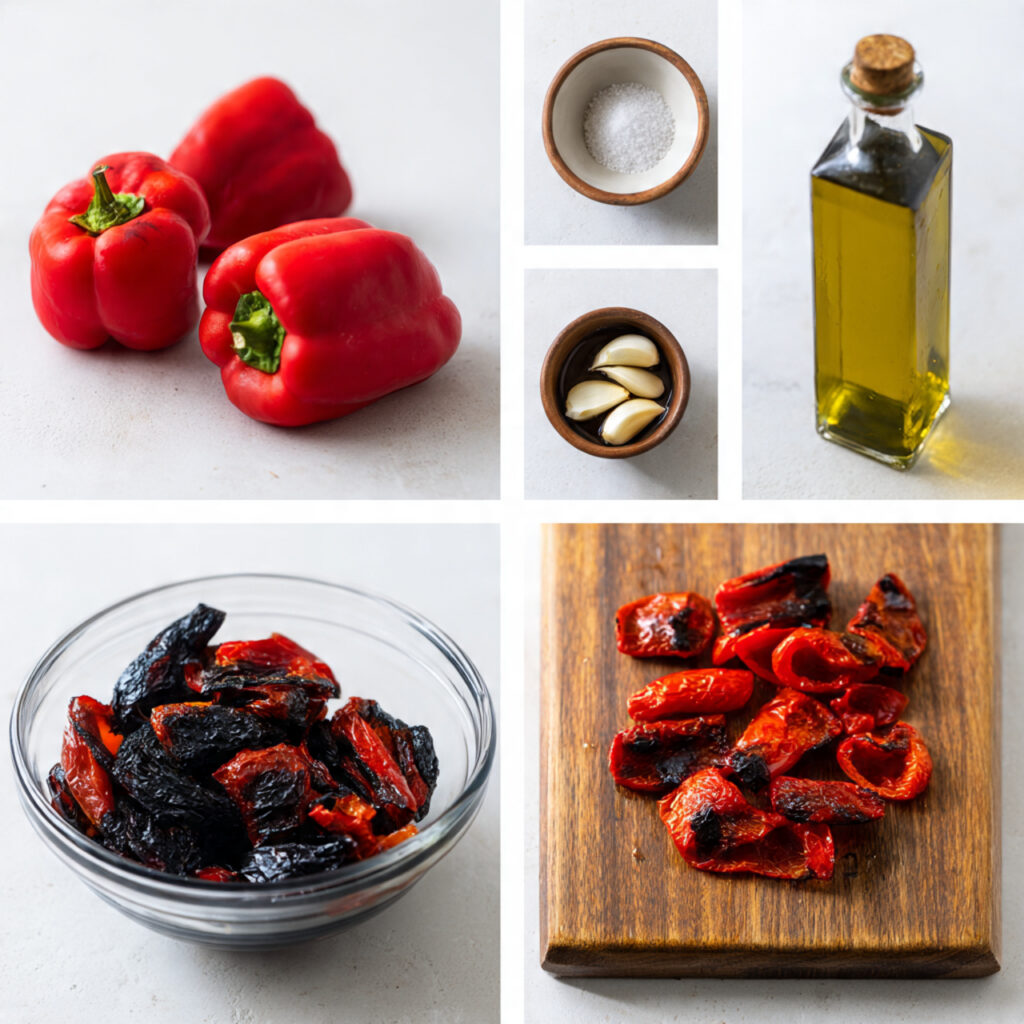
Step 3: The Steam Technique
Once charred, immediately transfer the hot peppers into a glass bowl and cover it tightly with plastic wrap or a plate. This traps the steam, which loosens the skin from the flesh, making peeling effortless after 15 minutes.
Step 4: Peeling and Deseeding
After resting, gently rub the charred skin away with your fingers or a paper towel. Remove the stem and seeds. Avoid rinsing them under water, as this washes away the precious smoky oils that give the Roasted Red Pepper its signature depth.
Nutritional Information
Beyond the incredible flavor, these peppers are a nutritional powerhouse. A single serving provides over 200% of your daily Vitamin C requirement. Data indicates that roasting peppers actually increases the bioavailability of certain antioxidants, specifically carotenoids like beta-carotene, which are essential for eye health and immune function.
Per serving (one pepper), you are looking at roughly 45 calories, 1 gram of protein, and 3 grams of fiber. They are naturally low in fat and sodium, making them an ideal heart-healthy addition to any meal plan.
Healthier Alternatives for the Recipe
To keep things light, you can roast your peppers without any added oil. The natural moisture inside the pepper is usually sufficient to prevent sticking if you use a high-quality non-stick broiler pan. For an extra nutrient boost, toss your finished peppers with fresh herbs like basil or oregano instead of heavy dressings.
If you are watching your sugar intake, pair the Roasted Red Pepper with high-protein sides like Greek yogurt or chickpeas. This combination creates a balanced macronutrient profile that stabilizes blood sugar levels while keeping you satiated for longer periods throughout your busy day.
Serving Suggestions
The versatility of this ingredient is truly unmatched. You can blend them into a creamy hummus for a vibrant, smoky dip, or toss them into a pasta primavera for a burst of color. They also make an incredible topping for sourdough toast topped with goat cheese and a drizzle of balsamic glaze.
For a sophisticated dinner party appetizer, serve them as a “carpaccio” on a platter with toasted pine nuts, capers, and a splash of lemon juice. The contrast between the sweet pepper and the salty capers is a classic culinary pairing that never fails to impress guests.
Common Mistakes to Avoid
- Over-steaming: Don’t leave the peppers in the bowl for more than 20 minutes. If they sit too long, the flesh becomes mushy and loses its structural integrity.
- Rinsing under water: As mentioned, never rinse the peeled pepper under the faucet. You are essentially washing away the flavor you worked so hard to create.
- Ignoring the char: If the skin isn’t sufficiently black, the flavor will remain “raw.” Don’t be afraid of the fire; that char is where the magic happens.
Storing Tips for the Recipe
Proper storage is essential for maintaining the quality of your Roasted Red Pepper. Once cooled, store them in an airtight glass container submerged in a little olive oil. This prevents oxidation and keeps them fresh in the refrigerator for up to one week.
If you want to keep them longer, you can freeze them in individual portions. They will maintain their flavor profile for up to three months. Simply thaw them overnight in the fridge before adding them to your favorite sauces or salads.
Conclusion
Mastering the art of the fire-roasted pepper is a gateway to better home cooking. With minimal effort, you can transform simple produce into a gourmet staple that enhances everything it touches. It is healthy, cost-effective, and deeply flavorful.
Are you ready to elevate your kitchen game? Try this technique tonight and let us know how you used your peppers in the comments section below! If you found this guide helpful, don’t forget to subscribe to our newsletter for more weekly culinary deep dives and professional cooking tips.
Roasted Red Pepper – Smoky, Sweet & Versatile
Course: blogCuisine: MediterraneanDifficulty: Easy4
servings5
minutes20
minutes70-90
kcalMastering the roasted red pepper is one of the most rewarding culinary skills you can acquire. By unlocking natural sugars through high-heat blistering, you create a versatile ingredient that acts as a flavor powerhouse for sauces, spreads, and salads. Smoky, sweet, and deeply flavorful – far superior to anything from a jar. Ready in about 40 minutes.
Ingredients
4 large, firm red bell peppers
2 tablespoons extra virgin olive oil
Generous pinch of flaky sea salt
Optional: 2 cloves garlic, minced
Directions
- Step 1: Prepare Peppers
- Wash peppers thoroughly. Pat completely dry with paper towels (moisture is enemy of good sear).
- Step 2: Char Peppers
- Place peppers directly over medium-high gas flame (or under oven broiler). Use tongs to rotate every 3-4 minutes until skin blisters and chars black in patches.
- Step 3: Steam Peppers
- Transfer hot peppers to glass bowl. Cover tightly with plastic wrap or plate. Let steam for 15 minutes (this loosens skin for easy peeling).
- Step 4: Peel and Deseed
- Gently rub charred skin away with fingers or paper towel. Remove stem and seeds. DO NOT rinse under water (washes away smoky oils).
- Step 5: Season
- Toss with olive oil, sea salt, and optional minced garlic.
- Step 6: Serve or Store
- Use immediately or store for later.
Notes
- Don’t over-steam: Peppers in bowl more than 20 minutes = mushy texture.
Never rinse under water: You wash away the smoky flavor you worked for.
Don’t fear the char: Insufficiently black skin = raw flavor. Char is where magic happens.
No gas stove? Use oven broiler on high, turning occasionally.
Storage: Store in airtight container submerged in olive oil in fridge up to 1 week.
Freeze: Freeze individual portions up to 3 months. Thaw overnight in fridge.