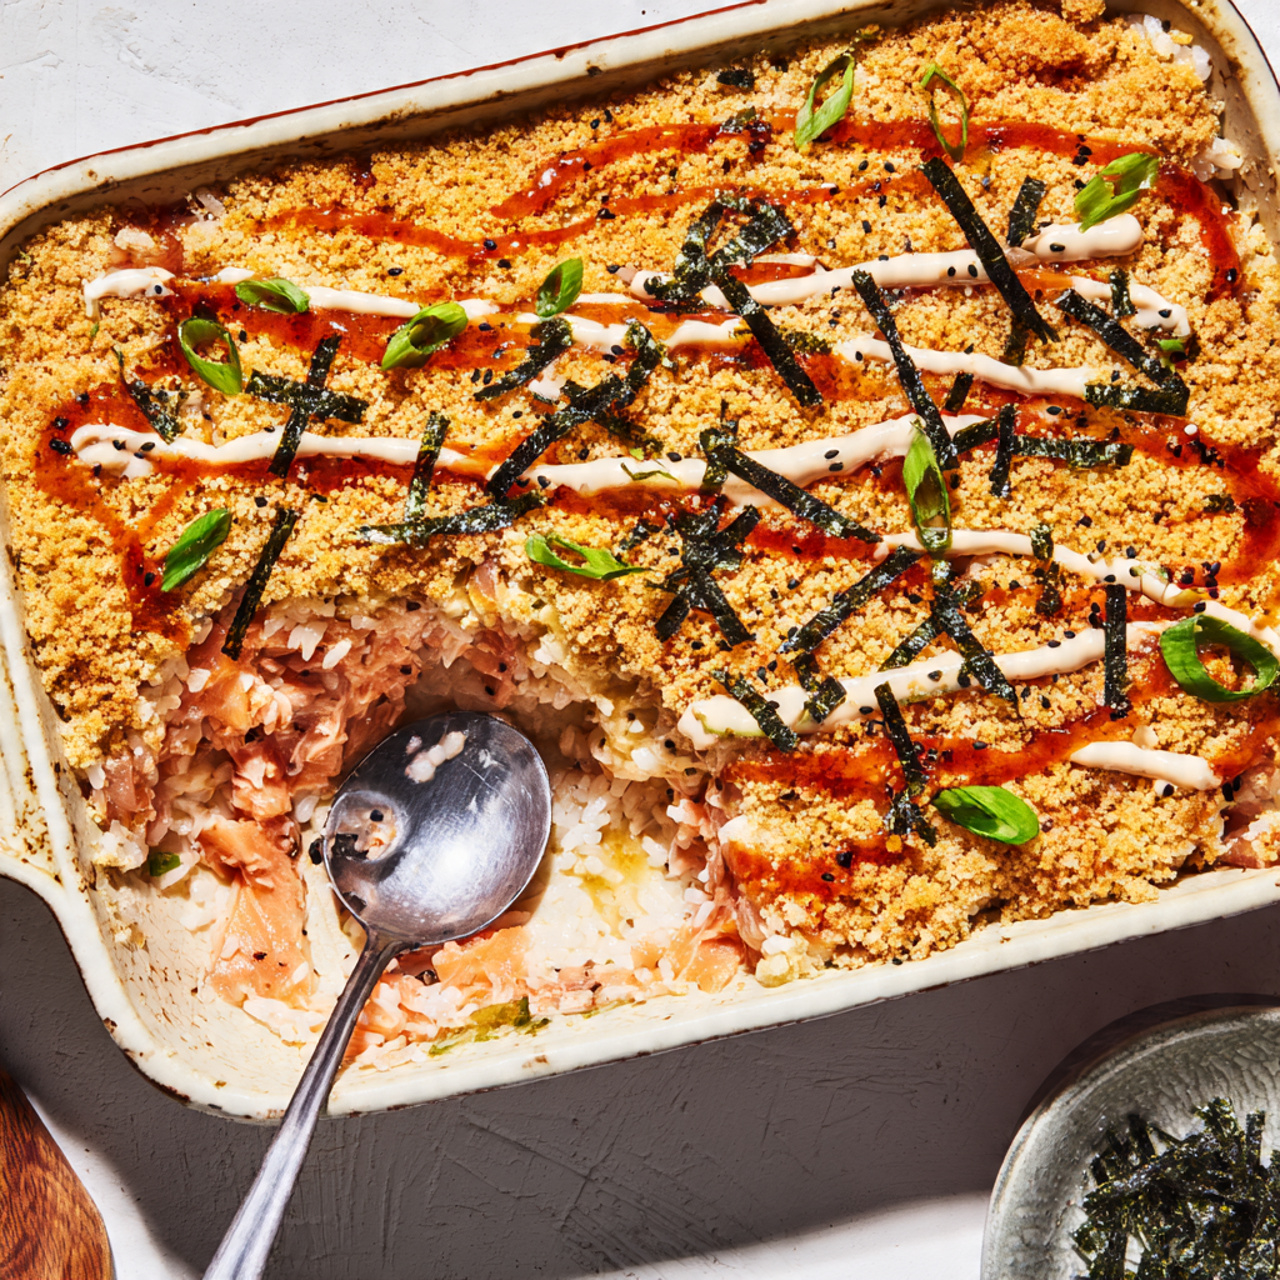
Best 30-Minute Salmon Sushi Bake Recipe You’ll Ever Try
What if you could capture all the addictive, umami-rich flavor of your favorite sushi roll in a shareable, warm, and incredibly easy casserole that comes together faster than ordering takeout? With viral food trends and “easy sushi” searches up by over 80%, the demand for fun, communal meals is clear.
This recipe is the perfect answer. We’re deconstructing the classic roll into a glorious, layered bake. This Salmon Sushi Bake Recipe is a game-changer for weeknights, potlucks, or a unique appetizer. Forget the fuss of rolling; we’re building a deconstructed sushi casserole with seasoned rice, creamy salmon, and all the classic toppings. Get ready for the ultimate easy sushi bake that delivers maximum flavor with minimal effort.
Table of Contents
Ingredients List
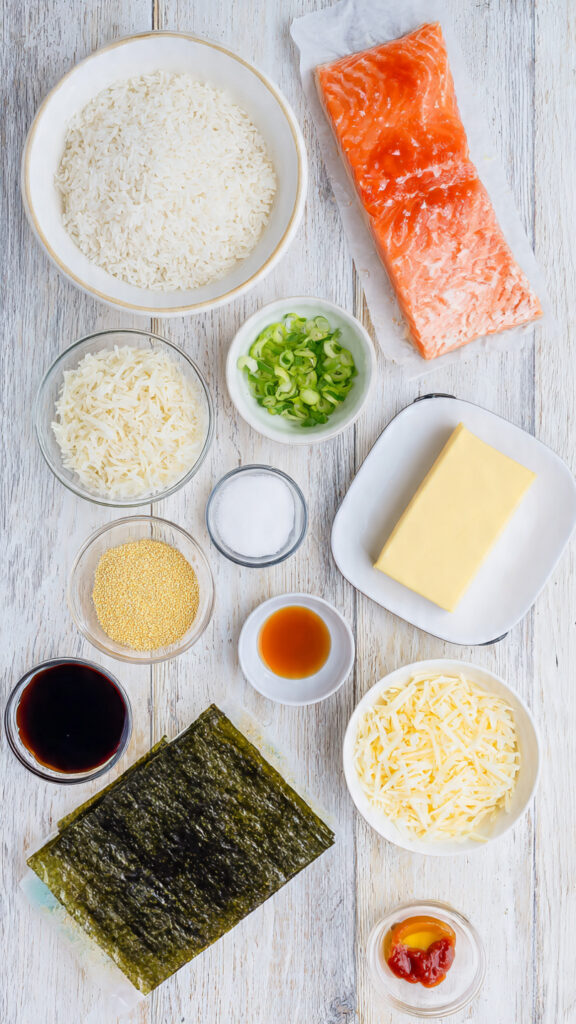
This recipe builds flavor in simple, impactful layers. Each component serves a specific purpose.
- For the Sushi Rice Layer:
- 3 cups freshly cooked sushi rice or short-grain white rice, warm
- 3 tbsp rice vinegar
- 1 tbsp granulated sugar
- 1 tsp salt
- For the Creamy Salmon Layer (The Star):
- 1 lb skinless salmon fillet, cooked and flaked (or two 5oz cans of high-quality pink salmon, drained)
- ½ cup Japanese Kewpie mayonnaise (or regular mayonnaise)
- 2 tbsp sriracha (adjust to taste)
- 1 tbsp soy sauce
- 1 tsp sesame oil
- 2 green onions, thinly sliced
- For the Topping & Garnish:
- ½ cup shredded mozzarella cheese (for meltiness)
- ¼ cup Japanese panko breadcrumbs
- 1 tbsp melted butter
- Nori (seaweed) sheets, cut into strips or small squares
- Sliced avocado, cucumber, and sesame seeds for serving
- Extra Kewpie mayo and sriracha for drizzling
Ingredient Swaps & Tips:
- Salmon: Canned salmon is a fantastic, budget-friendly shortcut. For fresh, you can bake, pan-sear, or even use leftover cooked salmon.
- Mayonnaise: Kewpie mayo is creamier and tangier, but regular mayo works. For a lighter version, use Greek yogurt thinned with a little lemon juice.
- Spice Level: Control the heat with the sriracha. Start with 1 tbsp and add more to the mix or just drizzle on top.
- Rice: Day-old rice works if you warm it slightly to make it pliable for seasoning.
- Cheese-Free: Omit the mozzarella. The panko topping will still add crunch.
Timing
The magic is in the assembly—no complex techniques, just layering and baking.
- Prep Time: 15 minutes
- Cook Time: 15 minutes
- Total Time: 30 minutes
Data Insight: Compared to the average time spent making individual sushi rolls (45-60 minutes for a novice), this 30-minute sushi casserole reduces active kitchen time by approximately 50%. It leverages the efficiency of batch preparation and baking, making it a prime example of “speed-scratch” cooking that’s perfect for our fast-paced lifestyles.
Step-by-Step Instructions
Follow these simple layers for a guaranteed delicious result every time.
Step 1: Season the Sushi Rice
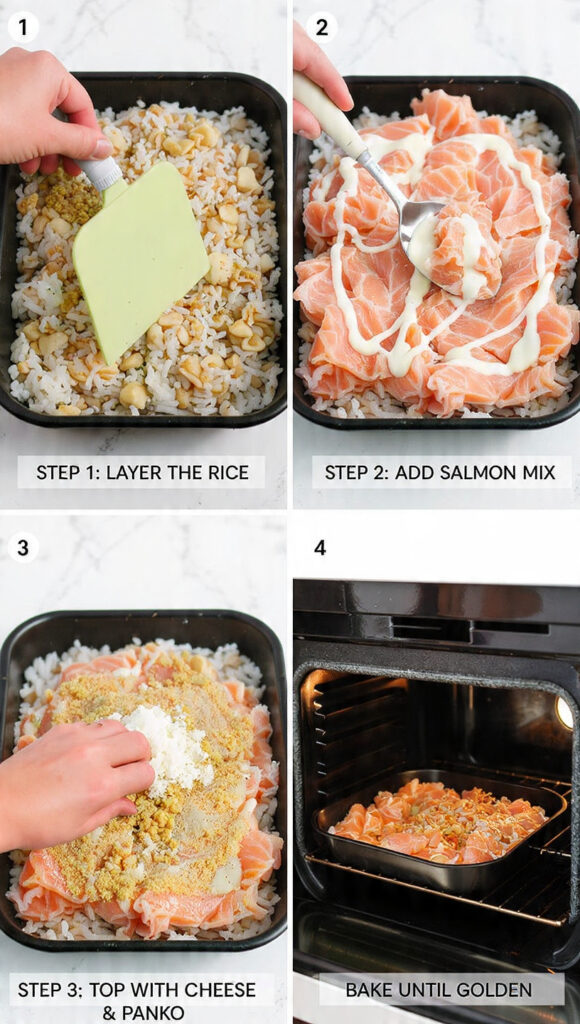
While your rice is still warm, transfer it to a large bowl. In a small saucepan, gently heat the rice vinegar, sugar, and salt until dissolved (or microwave for 20 seconds). Drizzle this mixture over the warm rice. Using a rice paddle or fork, gently fold and cut through the rice to season it evenly without mashing the grains. The rice should be glossy and slightly sticky. Spread it evenly into the bottom of a greased 8×8 inch or similar baking dish as your first layer.
Step 2: Create the Creamy Salmon Mix
In a medium bowl, combine the flaked salmon, Kewpie mayo, sriracha, soy sauce, sesame oil, and sliced green onions. Mix gently until everything is well combined and creamy. Taste and adjust seasoning—you can add a bit more soy or sriracha here.
Step 3: Layer and Top
Spread the creamy salmon mixture evenly over the seasoned rice layer. Sprinkle the shredded mozzarella cheese over the salmon. In a small bowl, mix the panko breadcrumbs with the melted butter until crumbs are coated. Sprinkle this buttery panko mixture evenly over the cheese.
Step 4: Bake to Golden Perfection
Preheat your oven to 425°F (220°C). Bake the casserole for 12-15 minutes, or until the cheese is fully melted and the panko topping is golden brown and crisp. If you want extra browning, you can broil for the final 1-2 minutes, watching closely to prevent burning.
Step 5: Serve with Style
Remove the bake from the oven and let it cool for 2-3 minutes. Garnish with strips of nori. Serve it directly from the dish, providing spoons for guests to scoop portions onto their plates or into small bowls. Serve with sliced avocado, cucumber, extra drizzles of Kewpie mayo and sriracha, and a sprinkle of sesame seeds.
Nutritional Information
This is a satisfying, protein-rich dish. Per serving (about 1 cup of bake):
- Calories: ~420
- Protein: 22g (Excellent source from salmon)
- Total Fat: 22g
- Saturated Fat: 5g
- Carbohydrates: 35g
- Fiber: 2g
- Omega-3 Fatty Acids: High, especially if using fresh or high-quality canned salmon
Data Insight: Salmon is one of the best dietary sources of EPA and DHA, the two primary omega-3 fatty acids crucial for heart and brain health. This salmon rice bake makes consuming these beneficial fats delicious and effortless.
Healthier Alternatives for the Recipe
Easily adapt this viral sushi bake to meet various dietary goals.
- Lower Carb/Keto: Replace the sushi rice with a layer of “cauliflower rice” that has been sautéed and well-drained. Season with rice vinegar substitute (a splash of apple cider vinegar).
- Lower Fat: Use light mayonnaise or the Greek yogurt substitute. Reduce or omit the cheese.
- Gluten-Free: Use tamari instead of soy sauce and ensure your panko is certified gluten-free.
- Dairy-Free: Omit the mozzarella cheese. The bake will be less creamy but still flavorful.
- Higher Protein: Add 1-2 extra cans of salmon or mix in lump crab meat.
Serving Suggestions
This dish is incredibly versatile and fun to serve.
- The Interactive Bowl: Set up a “sushi bake bar” with small bowls, nori sheets, and all the garnishes (avocado, cucumber, sesame seeds, spicy mayo) so everyone can build their own perfect bite.
- As a Dip: Serve with crispy wonton chips or baked seaweed snacks for scooping.
- For a Meal: Pair with a simple ginger salad or miso soup for a complete, restaurant-style experience at home.
- Potluck Perfect: Bring the bake in its dish, covered with foil, and reheat briefly. It travels and serves beautifully.
Common Mistakes to Avoid
Avoid these pitfalls to ensure your homemade sushi bake is perfect.
- Using Cold, Unseasoned Rice: The rice is the foundation. Warm, seasoned rice is essential for the right texture and flavor. Don’t skip the vinegar seasoning.
- Overmixing the Salmon: If using fresh-cooked salmon, flake it gently. Overmixing can turn it into a mushy paste. You want some texture.
- Skipping the Panko Topping: The buttery, crispy panko adds a crucial textural contrast to the creamy layers. It’s a non-negotiable element.
- Overbaking: You just need to melt the cheese and crisp the topping. Baking too long can dry out the salmon layer. Watch it closely after 12 minutes.
- Serving Immediately from a Scorching Dish: Letting it sit for 2-3 minutes allows the layers to set slightly, making it easier to scoop cleanly.
Storing Tips for the Recipe
- Leftovers: Store cooled leftovers in an airtight container in the refrigerator for up to 2 days.
- Reheating: Reheat individual portions in the microwave. For best texture, reheat in a toaster oven or conventional oven at 350°F until warmed through to re-crisp the topping.
- Make-Ahead: You can assemble the entire bake (through Step 3) up to 24 hours in advance. Cover and refrigerate. Add the panko topping just before baking, and add 3-5 minutes to the bake time since it’s starting cold.
Conclusion
This Salmon Sushi Bake Recipe is the ultimate fusion of flavor and convenience. With seasoned rice, a creamy spicy salmon layer, and a crispy topping, it delivers all the joy of sushi in a shareable, 30-minute bake. It’s perfect for a fun dinner, an impressive appetizer, or your next potluck hit.
Ready to try the viral sensation? Grab some salmon and rice and make this tonight! Share your creation in the comments and subscribe for more fun, easy recipes that are sure to impress.
FAQs
Can I use raw salmon in this sushi bake?
No. The baking time is not sufficient to safely cook raw salmon from scratch. You must use pre-cooked salmon (baked, pan-seared, or canned) to ensure food safety and the right texture.
What can I use instead of Kewpie mayonnaise?
Regular mayonnaise is a fine substitute. To mimic Kewpie’s unique tang, add a tiny squeeze of lemon juice or a pinch of MSG/umami seasoning to your regular mayo.
Is this served hot or cold?
It’s best served warm, right after baking. The warm, creamy texture is part of the experience. Leftovers are also delicious cold, straight from the fridge!
Can I make this with imitation crab?
Absolutely! It becomes a “California Roll Bake.” Use 1 lb of chopped imitation crab (kani) in place of the salmon. It’s a sweeter, milder, and very popular variation.
My bake is watery. What happened?
This is usually caused by wet ingredients. Ensure your canned salmon is well-drained, or pat your cooked salmon dry before flaking. Also, make sure your rice is properly cooked and not soggy.