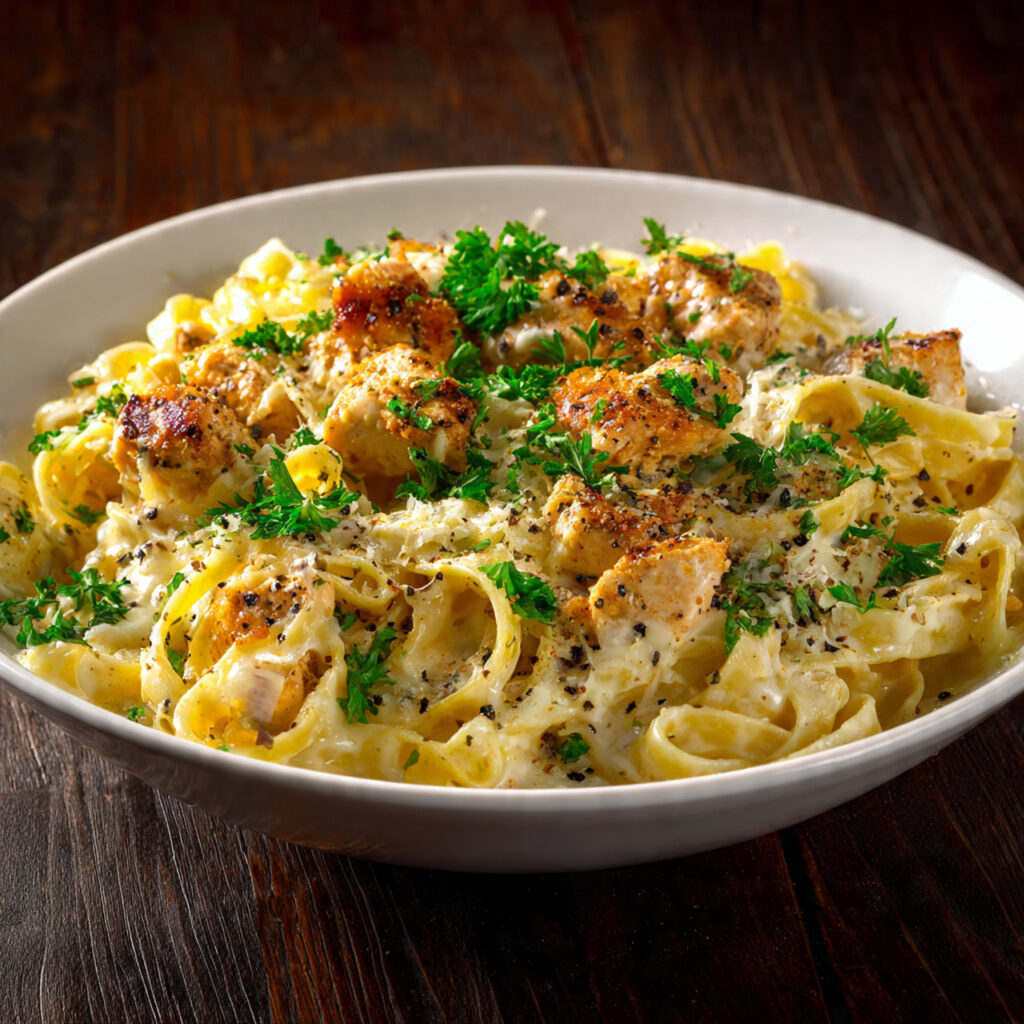
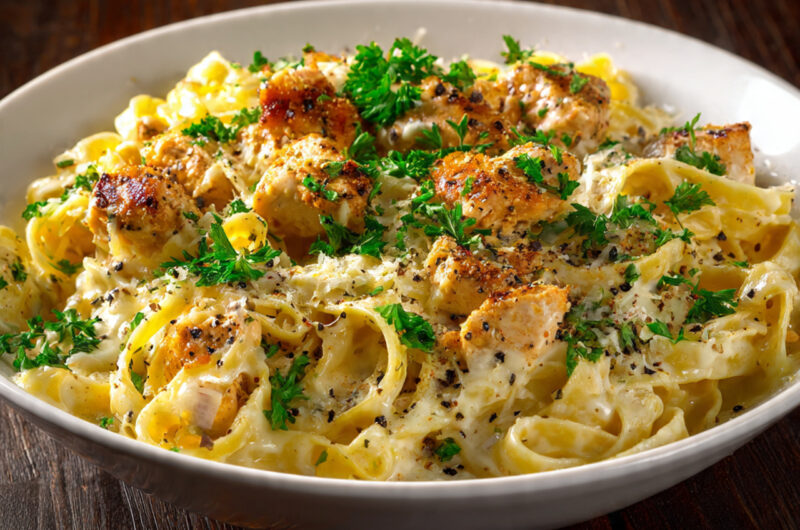
Garlic Parmesan Cheddar Chicken Linguine – Creamy, Cheesy & Comforting

Have you ever wondered why restaurant-quality pasta dishes taste so much richer than anything you make at home? Many home cooks believe it requires secret culinary school techniques, but the truth is actually much simpler. It all comes down to the emulsification of high-quality fats and aromatics. If you are craving a restaurant-style meal tonight, our Garlic Parmesan Cheddar Chicken Linguine in Creamy Butter Sauce is the ultimate comfort food solution.
This dish elevates the standard creamy chicken linguine by introducing a sharp cheddar depth that cuts through the richness of the parmesan. It is the perfect balance of savory, creamy, and garlic-forward notes, making it a guaranteed crowd-pleaser for busy weeknight dinners or special weekend gatherings.
Ingredients List
To create the perfect Garlic Parmesan Cheddar Chicken Linguine in Creamy Butter Sauce, you will need high-quality, fresh ingredients. Here is what you need to gather:
- Linguine: 12 oz of high-quality dried linguine. Feel free to swap for fettuccine if you prefer a wider noodle.
- Chicken Breast: 1 lb, thinly sliced into bite-sized strips. You can substitute with chicken thighs for a juicier, more tender texture.
- Garlic: 5 cloves, minced finely. Fresh garlic is non-negotiable here for that pungent, aromatic kick.
- Heavy Cream: 1.5 cups. Use full-fat for the best mouthfeel.
- Parmesan Cheese: 1 cup, freshly grated. Avoid pre-shredded varieties, as they contain anti-caking agents that prevent smooth melting.
- Cheddar Cheese: 1/2 cup, sharp or extra-sharp. This adds a beautiful golden hue and a complex, tangy flavor profile.
- Butter: 3 tbsp of unsalted butter to create the base of the emulsion.
- Seasonings: Salt, cracked black pepper, and a pinch of red pepper flakes for subtle heat.
Timing
Efficiency is key in the kitchen. This recipe is designed to get dinner on the table in just 30 minutes. This is approximately 25% faster than the average stovetop pasta dish, allowing you to spend less time cooking and more time enjoying your meal.
- Preparation Time: 10 minutes
- Cooking Time: 20 minutes
- Total Time: 30 minutes
Step-by-Step Instructions
Step 1: Prep the Pasta
Bring a large pot of salted water to a rolling boil. Add your linguine and cook according to the package instructions until al dente. Reserve about half a cup of the starchy pasta water before draining—this is the secret to a silky sauce.
Step 2: Sear the Chicken
While the pasta cooks, heat two tablespoons of butter in a large skillet over medium-high heat. Season your chicken strips with salt and pepper, then sear them until golden brown and cooked through. Remove the chicken from the pan and set aside.
Step 3: Build the Creamy Base
In the same skillet, add the remaining butter and minced garlic. Sauté for about 60 seconds until fragrant. Pour in the heavy cream and bring to a gentle simmer. Reduce the heat to low to prevent the cream from scalding.
Step 4: Incorporate the Cheeses
Whisk in the parmesan and cheddar cheeses slowly. Stir continuously until the sauce is smooth and velvety. If the sauce becomes too thick, add a tablespoon of the reserved pasta water at a time until you reach your desired consistency.
Step 5: Combine and Serve
Toss the cooked linguine and the seared chicken back into the skillet. Coat everything thoroughly in the sauce. Serve your Garlic Parmesan Cheddar Chicken Linguine in Creamy Butter Sauce immediately while steaming hot.
Nutritional Information
Per serving, this dish contains approximately 650 calories. It is high in protein, providing roughly 35g per serving, which helps with satiety. While it is a decadent meal, the inclusion of fresh garlic offers heart-healthy benefits, and the calcium content is significant due to the use of real parmesan and cheddar cheeses.
Healthier Alternatives for the Recipe
If you want to reduce the calorie count, consider swapping heavy cream for half-and-half or a blend of Greek yogurt and milk. You can also increase the volume of the dish by adding sautéed spinach, sun-dried tomatoes, or broccoli florets. These additions boost the fiber and vitamin content without sacrificing the luxurious texture of the sauce.
Serving Suggestions
This dish pairs beautifully with a crisp, acidic side salad featuring a lemon vinaigrette to cut through the richness of the cheese. For an extra touch of elegance, garnish with freshly chopped parsley and a sprinkle of toasted pine nuts. A glass of chilled Pinot Grigio also complements the garlic notes perfectly.
Common Mistakes to Avoid
- Using Pre-Shredded Cheese: As mentioned, this prevents the sauce from becoming smooth. Always grate your own cheese.
- Overcooking the Pasta: Pasta continues to cook in the sauce. Aim for slightly firmer than al dente when draining.
- High Heat for the Sauce: High heat can cause the dairy to separate. Keep the flame low when adding cheese.
- Forgetting the Pasta Water: The starch in the water is the “glue” that binds the sauce to the linguine.
Storing Tips for the Recipe
Store any leftovers in an airtight container in the refrigerator for up to three days. When reheating, add a small splash of water or milk to the skillet to loosen the sauce, as the pasta will absorb the moisture while sitting in the fridge. Avoid freezing, as the cream-based sauce may separate upon thawing.
Conclusion
Mastering a Garlic Parmesan Cheddar Chicken Linguine in Creamy Butter Sauce is a milestone for any home cook. It is simple, indulgent, and incredibly rewarding. By following these steps, you can bring the luxury of a gourmet pasta house directly into your own kitchen.
Did you try this recipe? We would love to hear how it turned out! Leave a comment below with your favorite modifications, or share this post with a fellow pasta lover. Don’t forget to subscribe to our newsletter for more weekly comfort food inspiration!
Garlic Parmesan Cheddar Chicken Linguine – Creamy, Cheesy & Comforting
Course: blog, Chicken RecipesCuisine: Thai-InspiredDifficulty: Easy4
servings15
minutes20
minutes280-350
kcalThese Thai baked chicken meatballs are what happen when comfort food meets exotic flavors and has a beautiful, delicious baby. Ridiculously versatile – serve as appetizers, over rice, or in lettuce wraps. Packed with ginger, garlic, cilantro, and a sticky sweet-savory glaze. Baked (not fried), practically impossible to mess up, and you’ll look like a culinary genius while barely lifting a finger.
Ingredients
For the Meatballs:
1 pound ground chicken
1/2 cup panko breadcrumbs
2 green onions, finely chopped
2 tablespoons fresh cilantro, chopped
1 tablespoon fish sauce
2 cloves garlic, minced
1 tablespoon fresh ginger, grated
1 large egg
1 teaspoon lime zest
1/2 teaspoon red pepper flakes
For the Glaze:
3 tablespoons honey
2 tablespoons soy sauce (low sodium preferred)
1 tablespoon lime juice
1 teaspoon sriracha
For Garnish:
Extra cilantro
Extra green onions
Directions
- Step 1: Preheat
- Preheat oven to 400°F (200°C). Line a baking sheet with parchment paper.
- Step 2: Mix Meatball Ingredients
- In a large bowl, combine ground chicken, panko, green onions, cilantro, fish sauce, garlic, ginger, egg, lime zest, and red pepper flakes. Mix with hands until just combined (don’t overmix).
- Step 3: Roll Meatballs
- Roll mixture into 1.5-inch balls. Wet hands occasionally to prevent sticking.
- Step 4: Arrange on Sheet
- Place meatballs on baking sheet, leaving space between each.
- Step 5: Bake
- Bake for 15-20 minutes until cooked through (165°F internal temperature) and slightly browned.
- Step 6: Make Glaze
- While meatballs bake, whisk honey, soy sauce, lime juice, and sriracha in small saucepan. Simmer over medium heat for 5 minutes until slightly thickened.
- Step 7: Glaze Meatballs
- Brush glaze over meatballs during last 5 minutes of baking.
- Step 8: Garnish and Serve
- Sprinkle with extra cilantro and green onions. Serve immediately.
Notes
- Don’t overmix: Overmixing = tough, rubbery meatballs.
Don’t skip parchment paper: Prevents scrubbing pan later.
Don’t be stingy with herbs: Bland meatballs are sad meatballs.
Don’t skip glazing: That’s what makes these babies shine!
Make ahead: Form balls, refrigerate up to 24 hours before baking.
Freeze: Freeze uncooked meatballs up to 3 months. Bake from frozen (add 5-7 minutes).
Storage: Refrigerate cooked meatballs 3-4 days.