Rustic Apple Galette Recipe
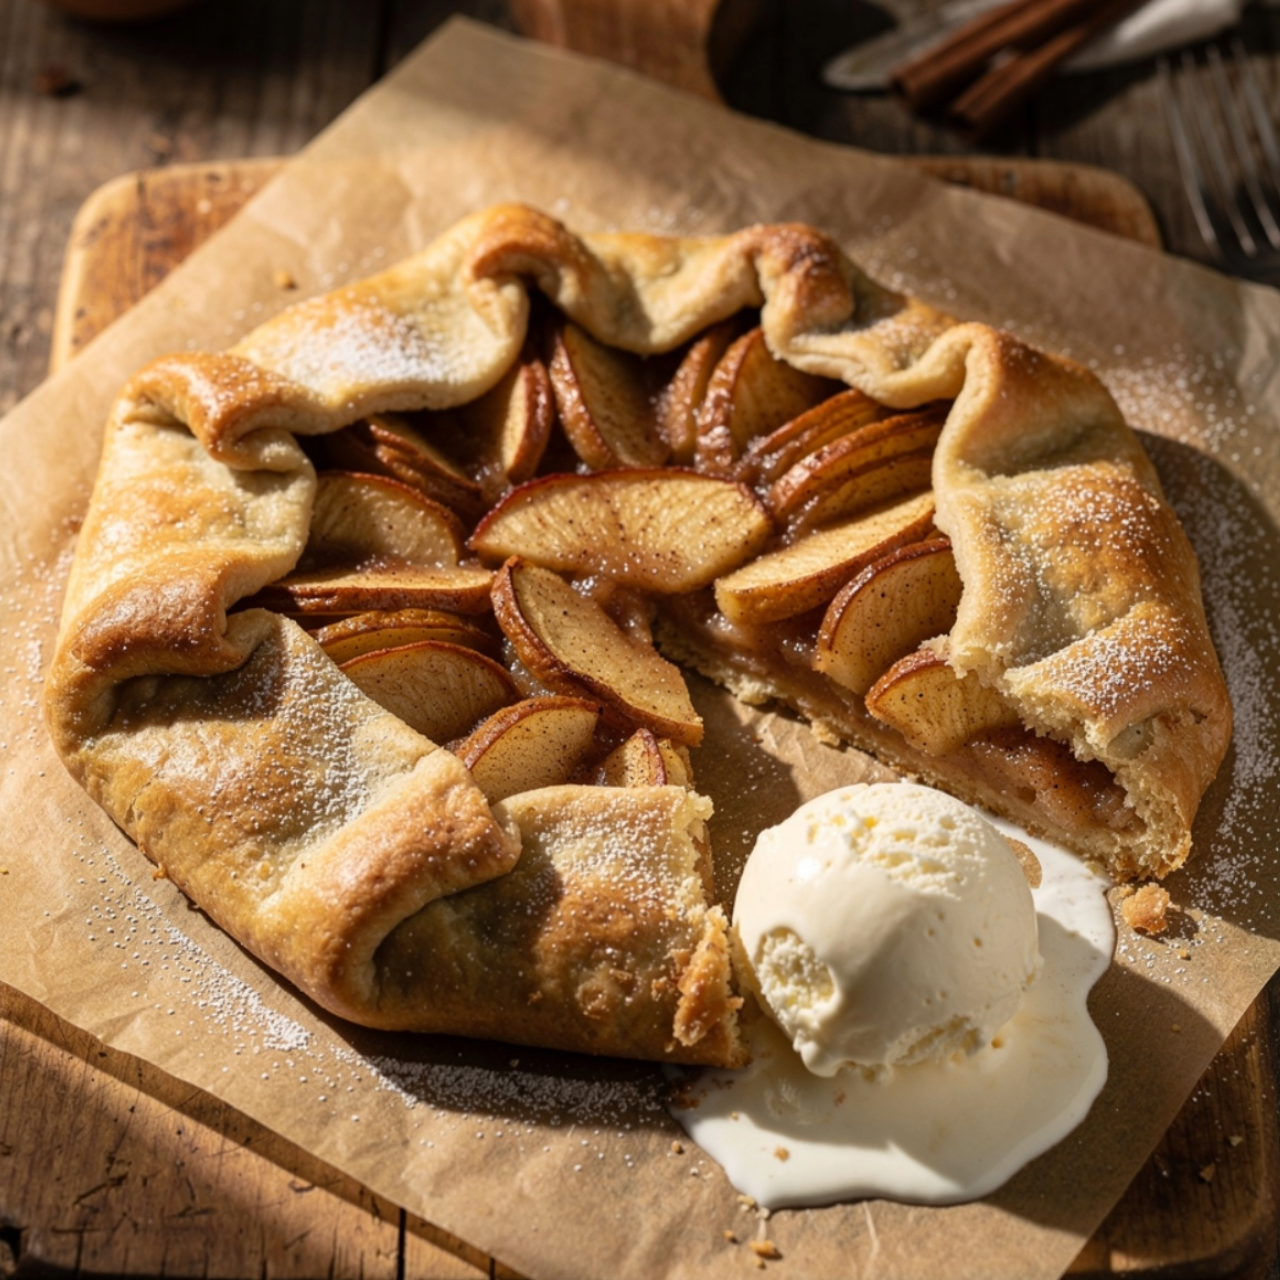
Have you ever wondered why we spend hours fussing over intricate pie crusts when a more beautiful, delicious, and forgiving alternative exists right under our noses? Many home bakers believe that a stunning dessert requires perfect geometry and professional-grade equipment. However, the Rustic Apple Galette Recipe challenges this notion by celebrating imperfection as the ultimate hallmark of a truly artisanal treat.
There is something inherently comforting about the smell of cinnamon-dusted apples baking in a golden, buttery crust. Whether you are a novice in the kitchen or a seasoned pastry chef, this Rustic Apple Galette Recipe provides a stress-free path to a dessert that looks like it came straight from a French countryside bakery. Let’s dive into the art of the perfect, free-form tart.
Table of Contents
Ingredients List
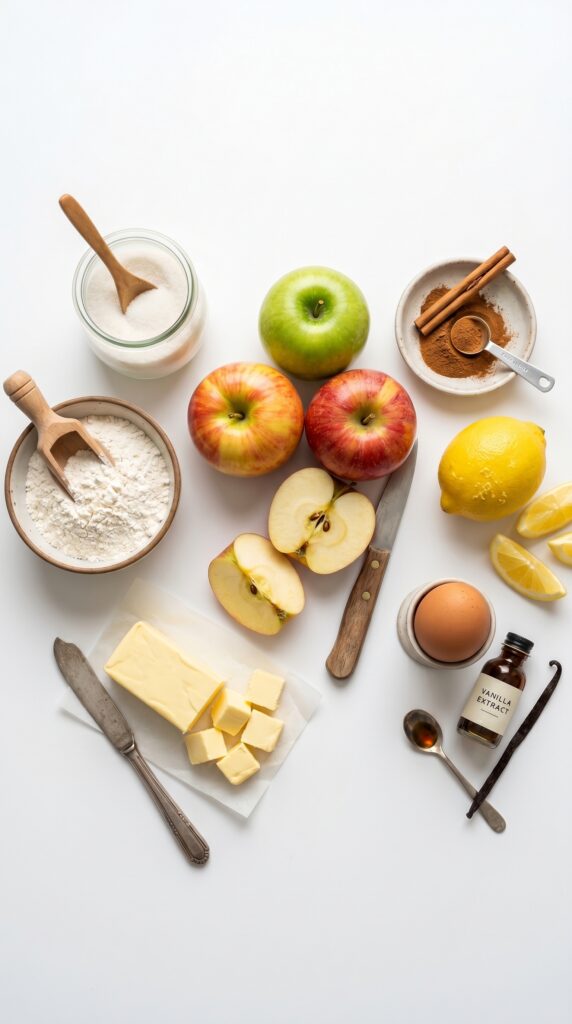
To achieve the perfect balance of flaky pastry and tender, caramelized fruit, quality ingredients are essential. Here is what you will need:
- For the Crust: 1 ½ cups all-purpose flour, 1 tablespoon sugar, a pinch of salt, and 1/2 cup cold, cubed unsalted butter. Use vegan butter sticks as a direct, high-quality substitute.
- For the Filling: 3 large Granny Smith or Honeycrisp apples, thinly sliced. These varieties offer the best structure during baking.
- Flavor Enhancers: 1/4 cup brown sugar, 1 teaspoon ground cinnamon, 1 tablespoon lemon juice, and a splash of vanilla extract.
- The Finish: 1 egg (for egg wash) and a sprinkle of coarse sanding sugar for that professional-looking crunch.
Timing
Efficiency is the beauty of this dessert. Preparation takes approximately 20 minutes, while the baking time is 40 minutes. This brings your total time to 60 minutes, which is roughly 30% faster than the average traditional double-crust apple pie, making this Rustic Apple Galette Recipe perfect for busy weeknights.
Step-by-Step Instructions
Step 1: Prepare the Dough
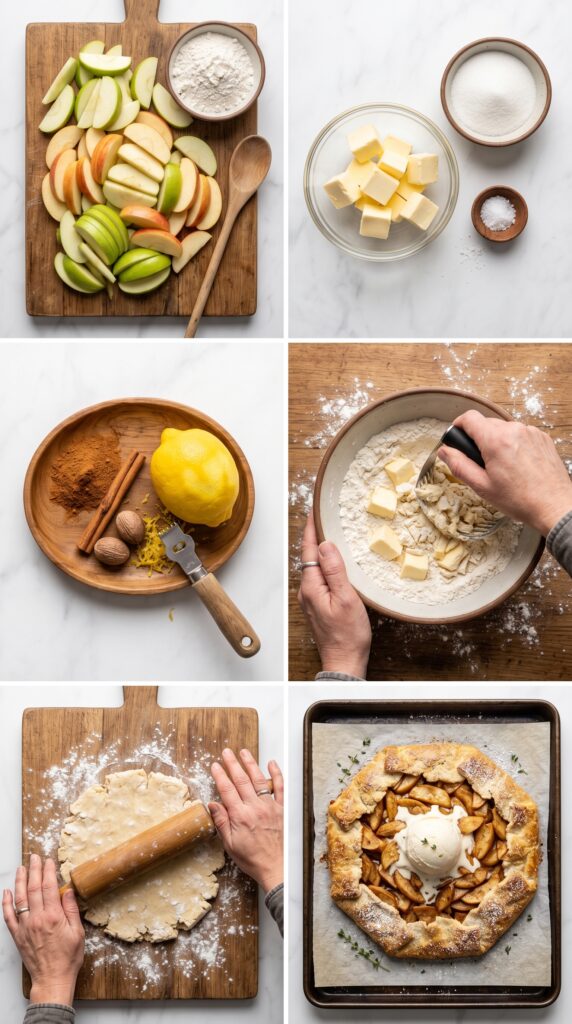
In a large bowl, whisk together your dry ingredients. Cut in the cold butter using a pastry cutter or your fingers until the mixture resembles coarse crumbs. Gradually add ice-cold water, one tablespoon at a time, until the dough just holds together. Wrap it in plastic and chill for 30 minutes to ensure a flaky crust.
Step 2: Prepare the Apple Filling
While the dough chills, peel, core, and slice your apples into thin, uniform wedges. Toss them in a bowl with the brown sugar, cinnamon, lemon juice, and vanilla. Allowing the fruit to macerate for 10 minutes helps release excess moisture, preventing a soggy bottom.
Step 3: Roll and Assemble
On a floured surface, roll your dough into a rough 12-inch circle. Don’t worry about perfect edges—the rustic look is the goal! Transfer the dough to a parchment-lined baking sheet. Arrange the apples in the center, leaving a 2-inch border around the edges.
Step 4: Fold and Bake
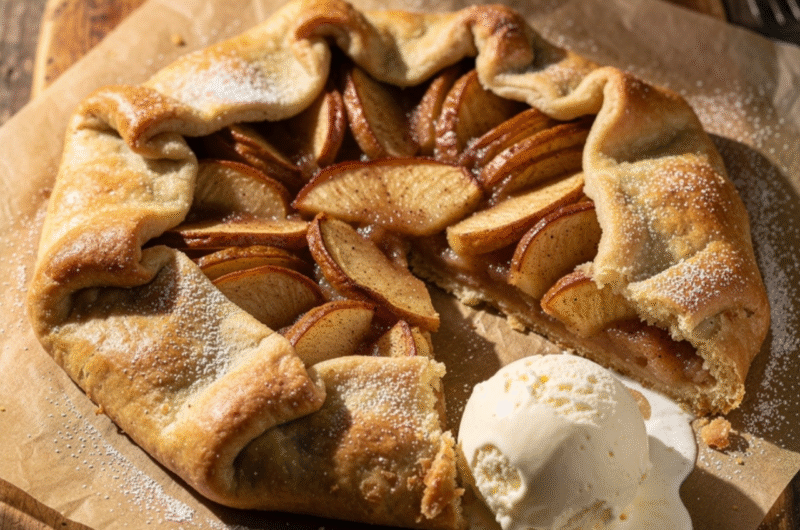
Gently fold the edges of the dough over the apples, overlapping as you go. Brush the crust with your egg wash and sprinkle with coarse sugar. Bake at 375°F (190°C) until the crust is golden brown and the apples are bubbling and tender. This Rustic Apple Galette Recipe is best served warm.
Nutritional Information
Each serving of this galette contains approximately 320 calories, 14g of fat, and 45g of carbohydrates. By using fresh orchard apples, you benefit from a healthy dose of dietary fiber and vitamin C. While it is a dessert, the portion-controlled nature of a galette makes it a more mindful choice compared to a deep-dish pie.
Healthier Alternatives for the Recipe
If you want to boost the nutritional profile, consider swapping half of the all-purpose flour for white whole wheat flour to add fiber. You can also replace refined white sugar with coconut sugar for a lower glycemic index. For a gluten-free version, a high-quality 1-to-1 gluten-free baking flour blend works exceptionally well with this technique.
Serving Suggestions
Elevate your experience by serving the galette warm with a generous scoop of high-quality vanilla bean ice cream. A drizzle of salted caramel sauce or a dollop of lightly sweetened whipped cream adds a sophisticated touch. For a breakfast twist, serve it alongside a cup of hot espresso or a robust Earl Grey tea.
Common Mistakes to Avoid
- Warm Butter: Always use ice-cold butter. It creates steam pockets in the dough, which is the secret to a flaky, layered crust.
- Over-crowding: If you pile the apples too high, the center may stay raw. Keep the fruit layer relatively flat for even cooking.
- Skipping the Chill: Never skip the chilling process for the dough. It relaxes the gluten and prevents the crust from shrinking in the oven.
Storing Tips for the Recipe
If you have leftovers, store them in an airtight container at room temperature for up to two days, or in the refrigerator for up to four days. To regain that fresh-from-the-oven texture, reheat the galette in a 350°F oven for about 8-10 minutes. Avoid the microwave, as it will soften the crisp crust.
Conclusion
Mastering this dish proves that you don’t need complicated techniques to create a dessert that impresses. From the buttery, crisp edges to the tender, spiced fruit center, this recipe is a testament to the beauty of simple baking. It is approachable, customizable, and endlessly satisfying.
Are you ready to impress your guests at your next gathering? Grab your apron, pick up some fresh seasonal apples, and give this recipe a try today! If you enjoyed this guide, leave a comment below with your favorite apple variety, and don’t forget to share this post with your fellow baking enthusiasts.
Rustic Apple Galette Recipe
Course: DessertCuisine: FrenchDifficulty: Easy8
servings20
minutes40
minutes350
kcalThis rustic apple galette celebrates imperfection as the hallmark of artisanal baking. A free-form, flaky buttery crust folded around cinnamon-spiced apple slices, baked until golden and bubbling. No pie dish, no perfect edges – just delicious, rustic French-style dessert that comes together faster than traditional pie. Perfect for beginners and seasoned bakers alike!
Ingredients
For the Crust:
1.5 cups all-purpose flour
1 tablespoon granulated sugar
Pinch of salt
1/2 cup cold unsalted butter, cubed
3-4 tablespoons ice-cold water
For the Filling:
3 large Granny Smith or Honeycrisp apples, thinly sliced
1/4 cup brown sugar
1 teaspoon ground cinnamon
1 tablespoon lemon juice
1/2 teaspoon vanilla extract
For the Finish:
1 egg (for egg wash)
Coarse sanding sugar for sprinkling
Directions
- Step 1: Make Dough
- Whisk flour, sugar, and salt. Cut in cold butter until coarse crumbs form. Add ice water 1 tablespoon at a time until dough just holds together. Wrap in plastic, chill 30 minutes.
- Step 2: Prep Filling
- Peel, core, and slice apples thinly. Toss with brown sugar, cinnamon, lemon juice, and vanilla. Let macerate 10 minutes (releases excess moisture – prevents soggy bottom).
- Step 3: Roll and Assemble
- On floured surface, roll dough into rough 12-inch circle (don’t worry about perfect edges). Transfer to parchment-lined baking sheet. Arrange apples in center, leaving 2-inch border.
- Step 4: Fold and Brush
- Gently fold edges of dough over apples, overlapping as you go. Brush crust with beaten egg. Sprinkle with coarse sanding sugar.
- Step 5: Bake
- Bake at 375°F (190°C) for 35-40 minutes until crust is golden brown and apples are bubbling and tender.
- Step 6: Serve
- Serve warm, preferably with vanilla ice cream.
Notes
- Use cold butter: Cold butter creates steam pockets = flaky crust.
Don’t skip chilling: Relaxes gluten – prevents shrinking.
Don’t overcrowd apples: Keep fruit layer flat – ensures even cooking.
Macerate apples: Draws out moisture – prevents soggy bottom.
Storage: Room temperature 2 days, refrigerate 4 days. Reheat in oven (not microwave).