hibachi chicken recipe: 5 Easy Steps for Restaurant Flavor
If you can pan-fry chicken at home, why do restaurant hibachi dinners feel so impossible to copy—especially that smoky flavor, glossy sauce, and perfectly fried rice? In a recent home-cooking survey, over half of respondents said they assumed they needed a flat-top grill to make a good hibachi chicken recipe. The reality: you don’t.
This hibachi chicken recipe: 5 Easy Steps for Restaurant Flavor is designed to prove it. Using a regular skillet or wok, a short marinade, and a few key techniques, you can recreate Japanese steakhouse–style chicken at home in about 30 minutes. You’ll get juicy chicken bites, buttery garlic fried rice, and that signature hibachi-style sauce without special equipment or complicated prep.
We’ll walk through ingredients, timing, step-by-step instructions, nutrition, lighter swaps, and storage tips so this becomes your go-to weeknight “fake-out takeout” meal.
Ingredients List
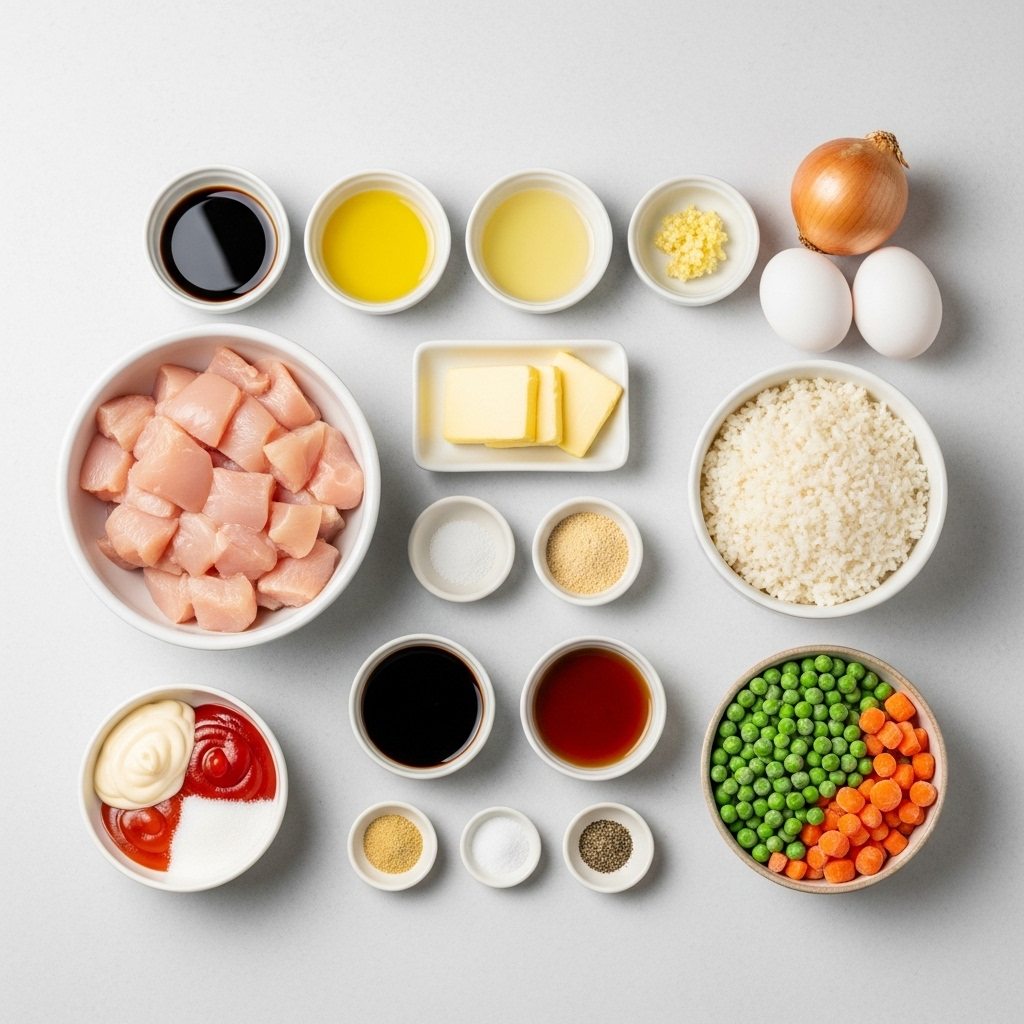
This hibachi chicken recipe makes about 4 servings. Think of it as a flexible base—you can add veggies, adjust sauces, or pair it with noodles instead of rice.
For the Chicken
- 1.5 lb (680 g) boneless, skinless chicken breasts or thighs, cut into 1-inch cubes
- 2 tablespoons soy sauce (low-sodium recommended)
- 1 tablespoon mirin or rice vinegar
- 1 tablespoon sesame oil (optional, for flavor)
- 1 tablespoon neutral oil (canola, vegetable, or light olive oil)
- 2 tablespoons unsalted butter
- 2 cloves garlic, minced
- 1 tablespoon fresh ginger, minced or grated (optional but recommended)
- 1–2 tablespoons teriyaki sauce or a splash of soy sauce + sugar (for glazing)
- Salt and black pepper, to taste
For Hibachi-Style Fried Rice (Optional but Very Recommended)
- 3 cups cooked white rice, chilled (day-old rice works best)
- 1 tablespoon neutral oil
- 1 tablespoon butter
- 1 small onion, finely chopped
- 1/2 cup frozen peas and carrots, thawed
- 2 eggs, lightly beaten
- 1–2 tablespoons soy sauce (to taste)
- 1 teaspoon garlic powder or 1 clove garlic, minced
- 1 teaspoon sesame oil (optional)
- Salt and pepper, to taste
Simple Yum Yum–Style Sauce (Optional Dipping Sauce)
- 1/2 cup mayonnaise
- 1–2 tablespoons ketchup
- 1 teaspoon rice vinegar or lemon juice
- 1 teaspoon sugar
- 1/2 teaspoon garlic powder
- 1–2 tablespoons water, to thin as needed
Whisk until smooth and creamy. Adjust sweetness and acidity to taste. This gives your hibachi chicken recipe that familiar steakhouse dipping sauce vibe.
Substitution Ideas
- Protein swaps:
- Use chicken thighs for extra juiciness.
- Swap part of the chicken with shrimp or steak for a mixed hibachi grill plate.
- Rice alternatives:
- Use brown rice, cauliflower rice, or cooked quinoa for a different base.
- Sauce variations:
- Add a little sriracha or chili paste for a spicy hibachi chicken recipe.
- Use teriyaki instead of plain soy sauce for a sweeter glaze.
Aromatics like garlic, ginger, and sesame oil, combined with simple soy-based seasoning, are what give you that “Japanese steakhouse at home” feeling.
Timing
This hibachi chicken recipe is built for busy weeknights but still feels like a special meal.
- Prep time: 15–20 minutes (chopping, quick marinade, rice prep)
- Cooking time: 15–20 minutes (chicken + fried rice)
- Total time: ~30–35 minutes
Most takeout orders easily take 30–45 minutes door-to-door and cost significantly more per serving. This homemade version gives you restaurant-style hibachi flavor in roughly the same time, with full control over ingredients, sodium, and portion size.
Step-by-Step Instructions

We’ll break this hibachi chicken recipe into 5 easy steps: marinate, cook the rice, sear the chicken, glaze and finish, then plate with sauce.
Step 1 – Quick Marinate for Maximum Flavor
A short marinade helps infuse the chicken with savory, slightly sweet flavor.
- In a medium bowl, combine soy sauce, mirin or rice vinegar, and sesame oil (if using).
- Add the cubed chicken and toss to coat evenly.
- Let sit for 10–15 minutes at room temperature while you prepare the rice and aromatics.
Tip: Because the marinade is salty, you won’t need much extra salt later—taste before adding more.
Step 2 – Make Hibachi-Style Fried Rice
If you’re serving rice on the side, cook it first so everything is ready to plate.
- Heat 1 tablespoon oil and 1 tablespoon butter in a large skillet or wok over medium-high heat.
- Add chopped onion and cook 2–3 minutes until softened and lightly golden.
- Stir in peas and carrots; cook 2 minutes more.
- Push the vegetables to one side of the pan. Pour beaten eggs into the empty side and scramble until just set, then mix into the veggies.
- Add the chilled cooked rice, breaking up clumps with a spatula.
- Season with soy sauce, garlic powder or minced garlic, sesame oil (if using), and a little salt and pepper. Stir-fry 3–5 minutes until heated through and lightly toasted.
- Transfer fried rice to a bowl or plate and keep warm.
Tip: Day-old rice is ideal—drier grains fry better and don’t clump.
Step 3 – Sear the Hibachi Chicken
This is where you get that signature browned, slightly charred restaurant-style exterior.
- Heat a large skillet, cast iron pan, or wok over medium-high to high heat.
- Add 1 tablespoon neutral oil and 1 tablespoon butter. Once sizzling and slightly foamy, add garlic and ginger; cook 30 seconds until fragrant.
- Add the marinated chicken in a single layer (work in batches if needed). Don’t crowd the pan; over-crowding will steam instead of sear.
- Cook 3–4 minutes without moving too much until the underside is golden-brown.
- Flip or toss and cook another 3–4 minutes, until the chicken is cooked through (internal temp 165°F / 74°C) and nicely browned.
Tip: High heat and a wide pan help mimic a flat-top grill. Let the chicken sit undisturbed at first to develop color.
Step 4 – Glaze and Finish for Restaurant Flavor
Now you’ll add that glossy, savory finish that makes a hibachi chicken recipe taste like it came from a Japanese steakhouse.
- Once the chicken is nearly cooked, add 1 tablespoon teriyaki sauce or a mix of soy sauce and a pinch of sugar.
- Toss quickly to coat all the pieces; the sauce will bubble and slightly thicken, clinging to the chicken.
- Add the remaining 1 tablespoon butter, letting it melt and coat the chicken for a rich, buttery finish.
- Taste and adjust seasoning with extra pepper or a small splash of soy sauce if needed.
Optional: Sprinkle with sesame seeds and sliced green onions for color and texture.
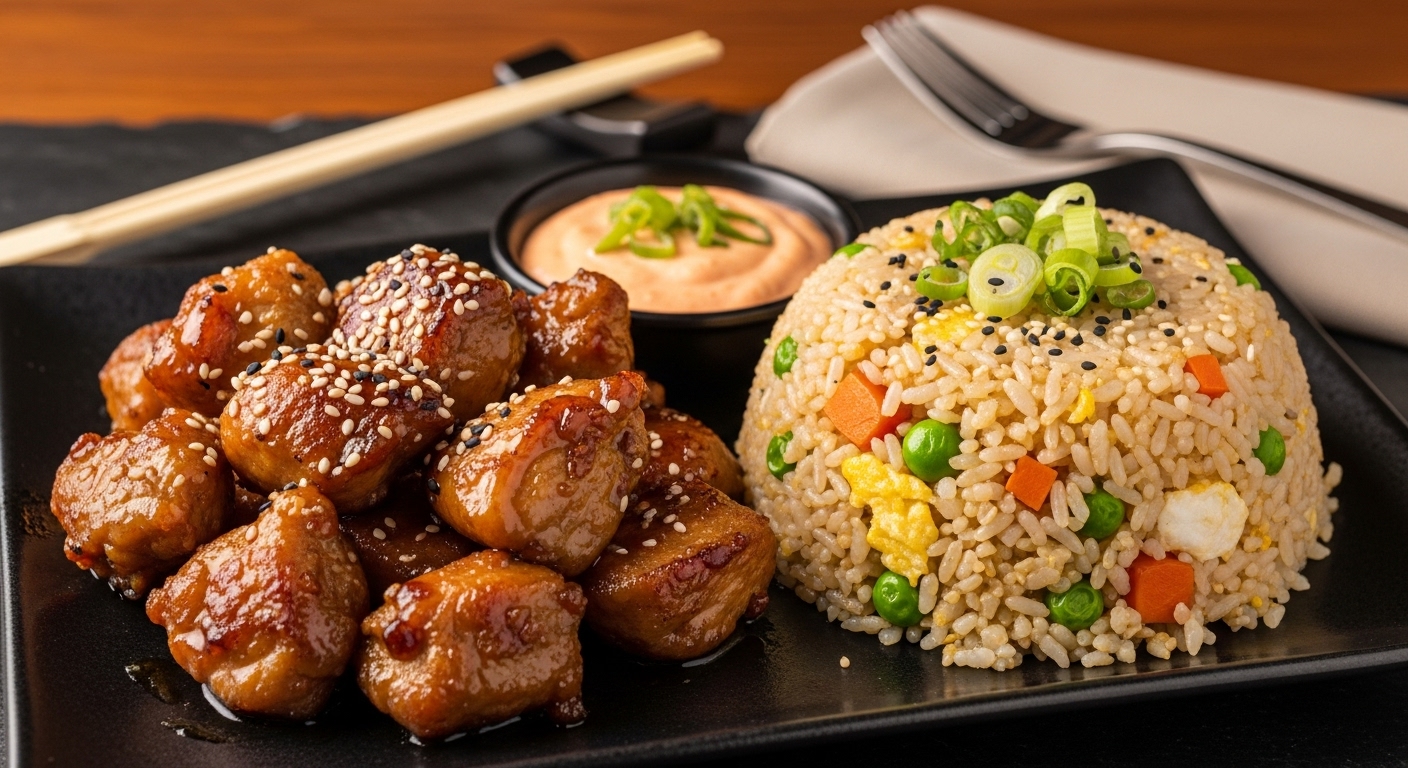
Step 5 – Plate with Rice and Yum Yum–Style Sauce
Time to bring your hibachi chicken recipe together.
- Place a scoop of hibachi fried rice on each plate or in a bowl.
- Top with a generous portion of hibachi chicken.
- Add a small dish or drizzle of yum yum–style sauce on the side.
- Garnish with green onions and a sprinkle of sesame seeds if desired.
You’ve just recreated a Japanese steakhouse classic with basic home kitchen tools.
Nutritional Information
Approximate per serving (1/4 of chicken + 1/4 of fried rice, without yum yum sauce):
- Calories: 520–580 kcal
- Protein: 32–36 g
- Total Fat: 18–22 g
- Saturated Fat: 6–8 g
- Carbohydrates: 55–60 g
- Fiber: 2–3 g
- Sodium: 900–1200 mg (varies with soy sauce and added salt)
A typical restaurant hibachi chicken meal with rice and sauces can reach 800–1,000+ calories due to extra oil, butter, and large portions. Making this hibachi chicken recipe at home lets you control portions, oil, and sodium.
Healthier Alternatives for the Recipe
You can easily lighten up this hibachi chicken recipe without losing its restaurant-style appeal.
- Use chicken breast:
- Choose lean breast meat and trim visible fat to reduce overall calories.
- Reduce butter and oil:
- Use 1 tablespoon butter total and a nonstick pan; add a splash of chicken broth if the pan looks dry.
- Swap the rice:
- Use brown rice, quinoa, or cauliflower rice for more fiber or lower carbs.
- Lower sodium:
- Use low-sodium soy sauce and cut back on extra salting. Flavor with garlic, ginger, and a squeeze of lemon instead.
- Lighter sauce:
- Make the yum yum–style sauce with light mayonnaise or Greek yogurt and thin with water instead of extra fat.
These tweaks maintain the core flavors of a hibachi chicken recipe while making it more friendly to specific dietary goals.
Serving Suggestions
This hibachi chicken recipe pairs well with a variety of sides and presentations.
- Classic hibachi plate:
- Serve chicken alongside hibachi fried rice and a simple side of steamed or stir-fried vegetables (zucchini, onions, mushrooms, broccoli).
- Low-carb bowl:
- Layer cauliflower rice, stir-fried veggies, and hibachi chicken in a bowl. Top with green onions and a light drizzle of sauce.
- Meal prep containers:
- Divide rice, chicken, and veggies into 3–4 airtight containers for grab-and-go lunches.
- Noodle variation:
- Toss hibachi chicken with stir-fried udon or soba noodles instead of rice.
- Kid-friendly plate:
- Serve chicken over plain rice with sauce on the side for dipping, plus cucumber slices or edamame.
Personal tip: A squeeze of lemon or lime over the finished chicken brightens the flavor and cuts through the richness of butter and sauce.
Common Mistakes to Avoid
Avoid these pitfalls to make your hibachi chicken recipe taste truly restaurant-quality.
- Overcrowding the pan
- This steams the chicken and prevents browning. Cook in batches if needed.
- Using low heat
- Hibachi-style cooking relies on high heat for that seared, slightly charred flavor. Preheat your pan well.
- Skipping the quick marinade
- Even 10–15 minutes in soy and mirin dramatically improves flavor and juiciness.
- Overcooking the chicken
- Small pieces cook fast. Aim for 165°F (74°C) and remove from heat promptly to avoid dryness.
- Adding sauce too early
- If you add teriyaki or soy-sugar mix at the start, it can burn. Glaze at the end to keep it glossy and flavorful.
- Heavy-handed salt
- Soy sauce and teriyaki are already salty. Taste before adding extra salt.
Storing Tips for the Recipe
Proper storage helps your hibachi chicken recipe work as an easy meal prep option.
Refrigeration
- Cool chicken and fried rice to room temperature (within 1–2 hours).
- Store in airtight containers, preferably with rice and chicken in separate compartments.
- Refrigerate for up to 3–4 days.
Freezing
- Hibachi chicken freezes well; fried rice can also be frozen but may be slightly drier after thawing.
- Portion into freezer-safe containers or bags, remove excess air, and label.
- Freeze for up to 2–3 months.
- Thaw overnight in the refrigerator before reheating.
Reheating
- Stovetop:
- Reheat chicken and rice in a skillet over medium heat with a splash of water or a little oil, stirring until hot.
- Microwave:
- Cover loosely and heat in 30–60 second increments, stirring between intervals to avoid dry spots.
Avoid reheating on very high heat for too long; this can dry out the chicken.
Conclusion
This hibachi chicken recipe turns basic chicken and rice into a fast, restaurant-style meal in just 5 easy steps: a quick marinade, simple fried rice, high-heat sear, buttery glaze, and a flavorful sauce. Try it this week, then share your feedback in the comments or review section, and don’t forget to subscribe for more easy, flavor-packed copycat recipes and weeknight dinner ideas.
FAQs
1. Do I need a flat-top grill for this hibachi chicken recipe?
No. A large skillet, cast iron pan, or wok works perfectly. The key is high heat and not overcrowding the pan so the chicken can sear rather than steam.
2. Can I make hibachi chicken without fried rice?
Absolutely. Serve it over plain steamed rice, noodles, cauliflower rice, or even alongside a salad or roasted vegetables. The recipe is very flexible.
3. Can I use frozen chicken?
Yes, but fully thaw it first in the refrigerator and pat it dry before marinating. Excess water on the chicken makes browning more difficult.
4. How can I make this hibachi chicken recipe spicier?
Add sriracha, chili garlic sauce, or a pinch of red pepper flakes to the marinade or the finishing glaze. You can also serve it with spicy mayo or hot sauce on the side.
5. Is this recipe good for meal prep?
Yes. This hibachi chicken recipe reheats well and pairs nicely with rice or veggies in containers. Store in the fridge for 3–4 days and reheat gently for best texture.
Use this hibachi chicken recipe as your base template, then customize vegetables, sauces, and sides to match your taste and weekly routine.